Empty Webforms Mails
This issue strictly affects Drupal websites that are using the Webforms module and have configured the E-mails / Handlers feature.
This feature enables your webform to route data to external applications, send notifications, and/or send confirmation e-mails upon submission.
If the body of your e-mail after processing the webform submission is empty or blank, and you are sending it as an HTML, you are in the right place.
If your webform has configured the E-mails / Handlers feature (hereinafter "handler"), and you have configured it in a way which constructs the e-mail using HTML as shown in the below screenshot, recent upgrades to PHP and Drupal might result in the e-mail being blank or feature an empty body despite all the fields appearing correct in the message section.

The webform handler with HTML settings.
The solution to this is using a Twig template instead of a custom body. In order to do this:
Select the handler that you wish to modify and click
Edit.Make a copy of all the content in the Custom HTML Body.
Click the dropdown menu under the body field and select
Twig templateas shown below.
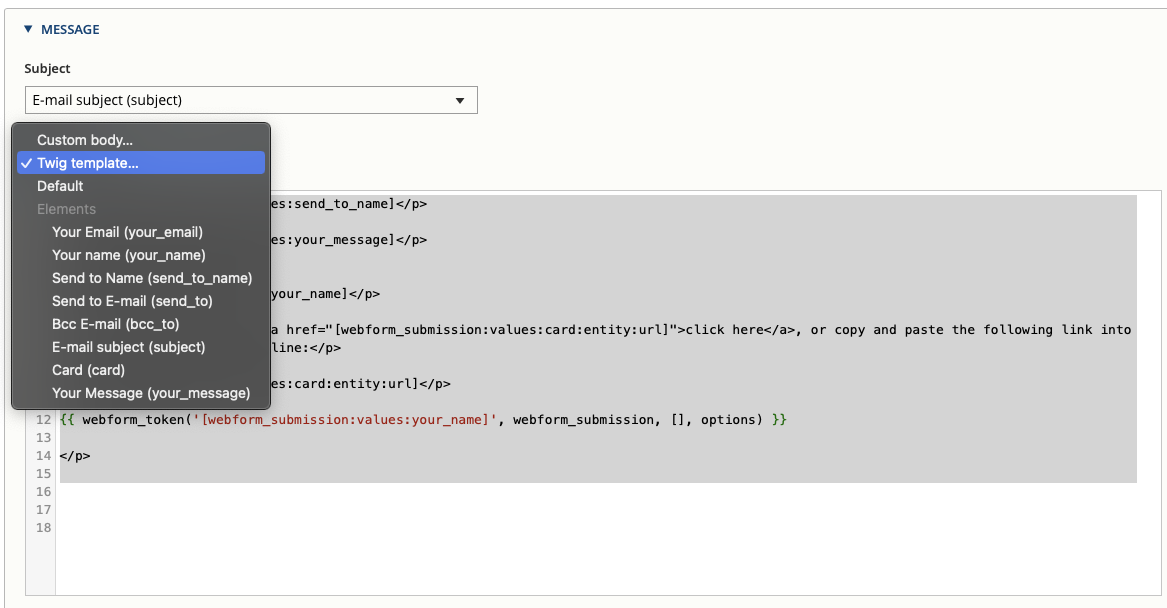
The body dropdown selection in the message section.
- Paste the content copied in step two.
You now have to change all the HTML references in the data.
There are several ways to achieve this.
If, for instance, you want to convert the following access to the form data <p>[webform_submission:values:element_key]</p> , we could use:
<p> {{ data.element_key }} </p>or<p> {{ data['element_key'] }} </p>
instead of the [webform_submission:values:element_key] accessor.
We can also output tokens using the webform_token() function:
{ webform_token('[webform_submission:values:element_value]', webform_submission, [], options) }}
However, this requires you to identify and use the correct element_key.
In order to identify which element_key values you have available, you can either print them in the e-mail using the webform_debug() function via {{ webform_debug(data) }}, or scroll down to the included e-mail values/markup section.
In the below screenshot, you can find an example of the different values and what they represent.
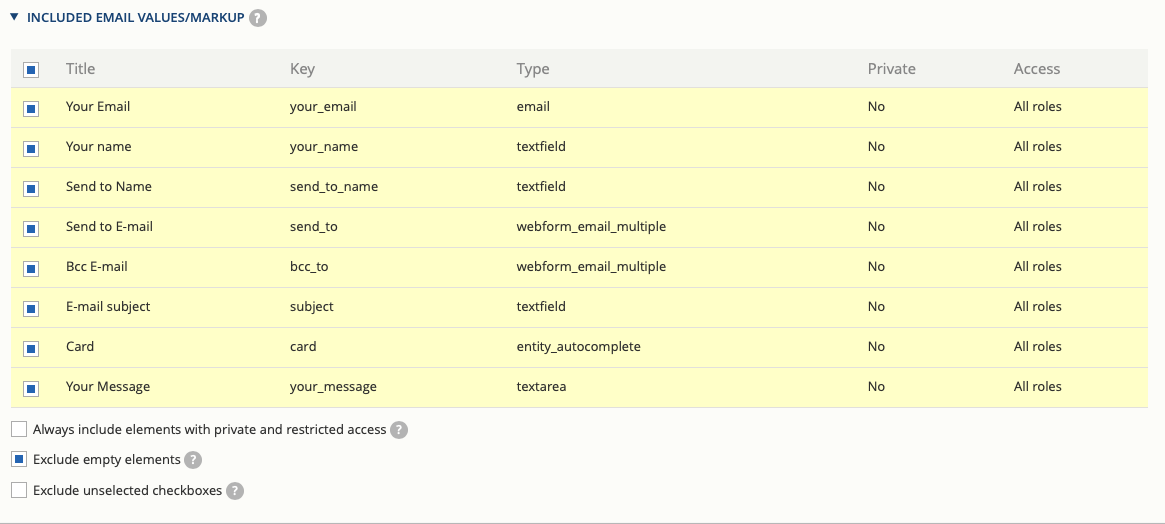
The included e-mail values/markup hints.
In the same section, you may also find a quick reference about Twig and which variables are available.
You can further find a dedicated guide on how Twig is used in Drupal here.
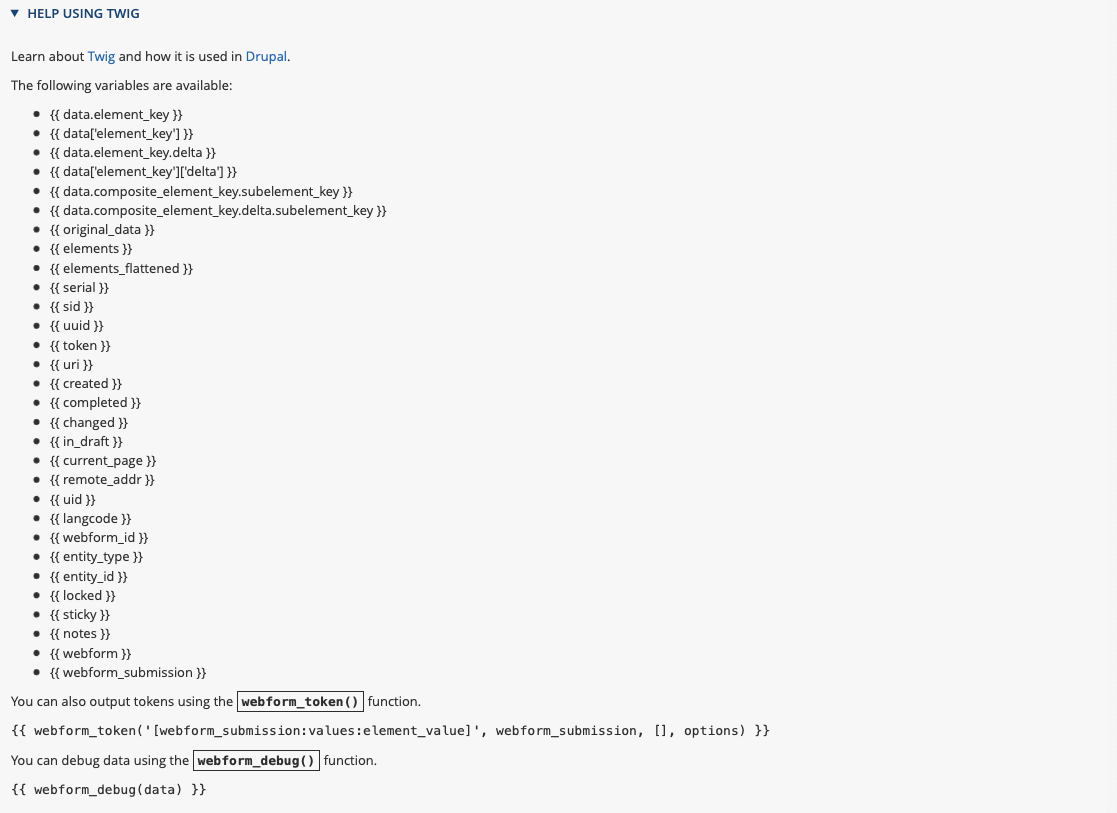
The Twig help section.
- Once you have replaced all the body with the twig elements and keys include in the first line of the body an empty
<p>tag and a new line as follows:
<p></p>

<!-- here goes your message, after the empty line -->
<p> {{ data['send_to_name'] }} </p>

<p> {{ data.your_message }} </p>
<!-- rest of your content ... -->
This will not affect how the message is written in the e-mail, but will likely ensure the e-mail is properly populated.
Summary
1 - If your custom body looks like the below screenshot and your e-mails are empty
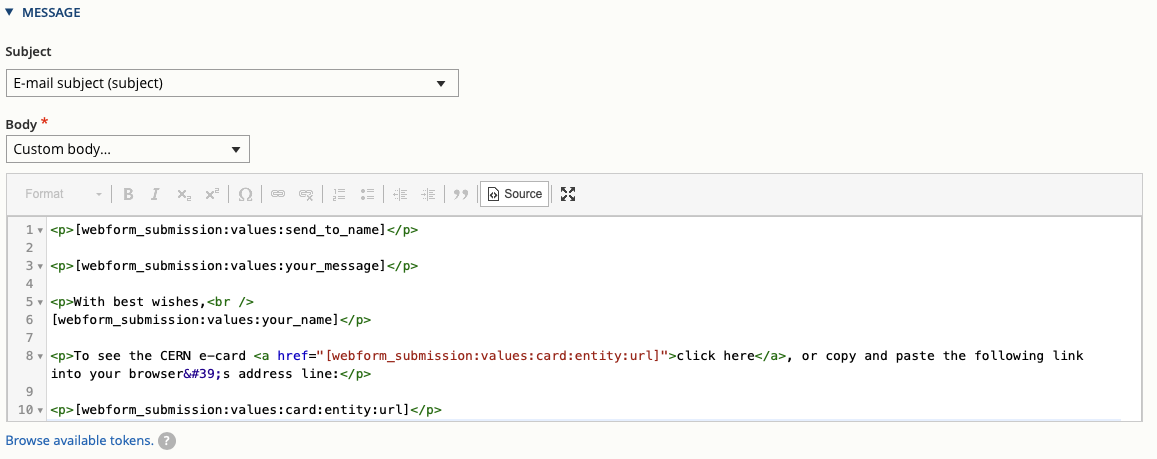
The message body using custom HTML.
2 - Convert your custom body to use a Twig template as shown below.
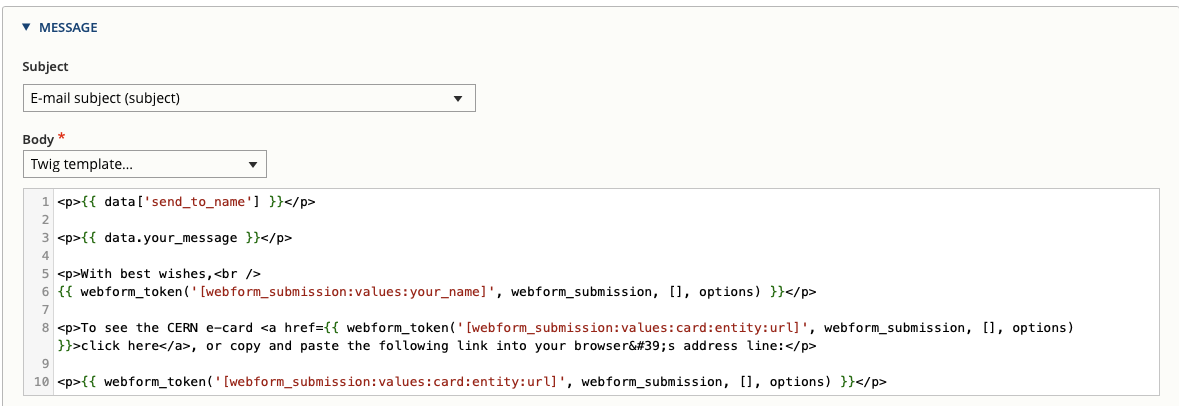
The message body using a Twig template.
3 - Add an empty <p> tag and a new line as first line of your body.
If you face any issue doing this conversion, please post on the Community Forums.