[LEGACY] Install Custom Modules
As of 10th of April 2024, the Drupal service no longer supports the installation of community-contributed, or custom modules and themes for new websites. See OTG0149420 for more details. The existing documentation is kept solely to assist for websites existing before 10 April 2024.
In the event that the modules provided via the CERN Drupal Distribution) are not sufficient for your needs, you may:
- post on the CERN Drupal Community Forums to see whether others have already achieved what you are looking for;
- submit a request to the Drupal Team to evaluate whether the feature(s) you require can be accommodated by adding a new module to the CERN Drupal Distribution, benefitting all CERN websites; or
- manually install a custom module directly on your website(s).
Please note that installing and using custom modules requires both (a) continuous maintenance and (b) continuous attention to updates, security patches, and new feature releases. Indeed, any website is a living and breathing piece of software. This work will solely be the responsibility of the website owner(s) as any custom module not in the CERN Drupal Distribution will not benefit from the centrally managed updates. If you require a set-and-forget solution, please do not exceed what is offered in the CERN Drupal Distribution.
Installing Modules
In order to install a custom module on a website, it is first and foremost a requirement that you have the appropriate permissions. Typically, this means being a member of the associate e-group. If you do not have administrative rights on the website in question, please get in touch with the website owner(s) before proceeding.
Installing Modules via WebDAV
For users wanting to add local modules without going through the technical option(composer) can use the following steps to add modules/ themes through “webdav”:
- Download the modules you wish to add locally on your machine.
- Access WebDAV following these steps.
- Copy the modules you downloaded to add in the modules directory.
- Login to your website and navigate to
Extend, taking you to<your-site-url>/admin/modules. - Search for the module you added, check the box for the corresponding line, scroll to the bottom,
Install.
Your website should now feature the newly installed module(s).
Installing Modules via Composer
Kindly note that while extensive, this is the recommended workflow for installing custom modules. The reason for this is that the actual installation as well as subsequent management and maintenance is significantly easier and largely automated. Indeed, composer install libraries and dependencies automatically by pasting a single line. Please note how a custom composer.json is installed after the CERN Drupal Distribution, thus overriding any overlapping modules.
Installing modules using composer requires access to oc.
Please see this guide for how to connect to your website using oc.
The following steps require an understanding of how git works. If you are wholly unfamiliar with git, Gitlab, and repositories, please either refer to this guide, or skip to the WebDAV section. If you have any questions about the below steps, please create a thread on the CERN Drupal Community Forums.
It you lock the version(s) of the module(s) in your custom composer.json, it is your responsibility to ensure these are updated as necessary for both compatibility and security reasons. Additionally, if you choose to include specific versions of modules otherwise included in the CERN Drupal Distribution, it is your responsibility to ensure continued compatibility with other centralised modules. We strongly recommend not overriding what is included centrally and not locking modules to a specific minor version.
- Start by creating a new Gitlab repository with
composer.json.
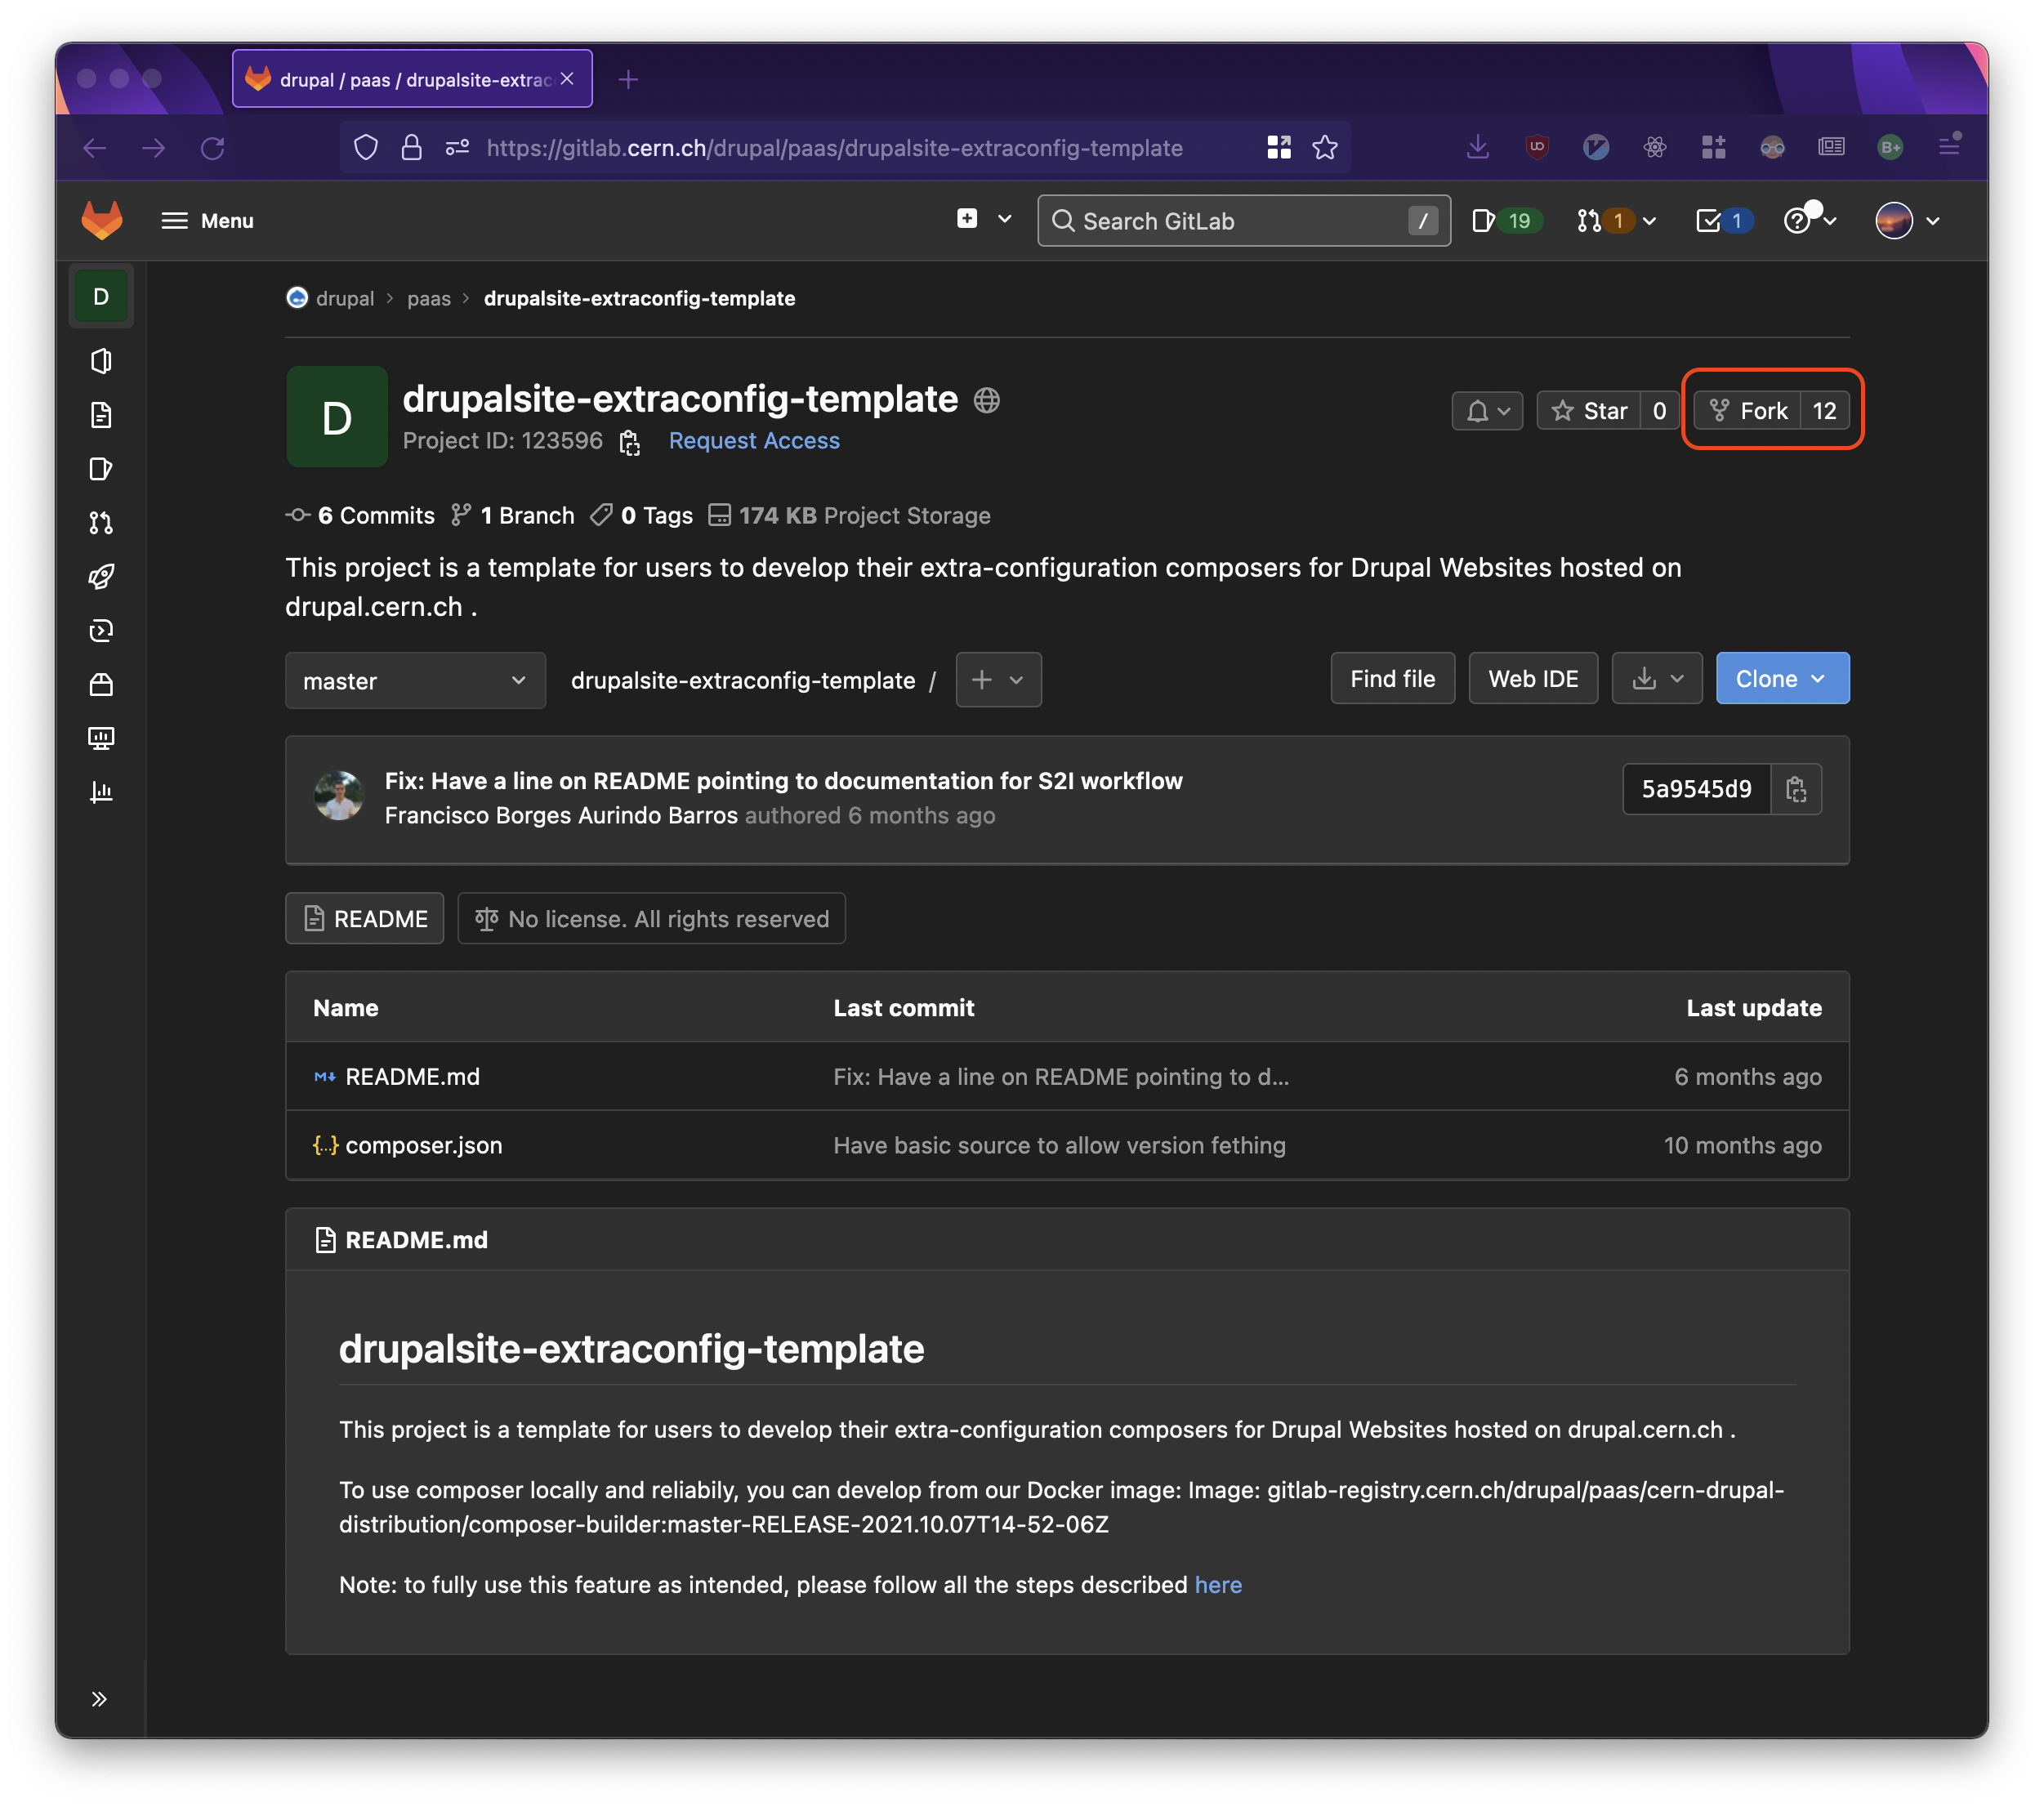
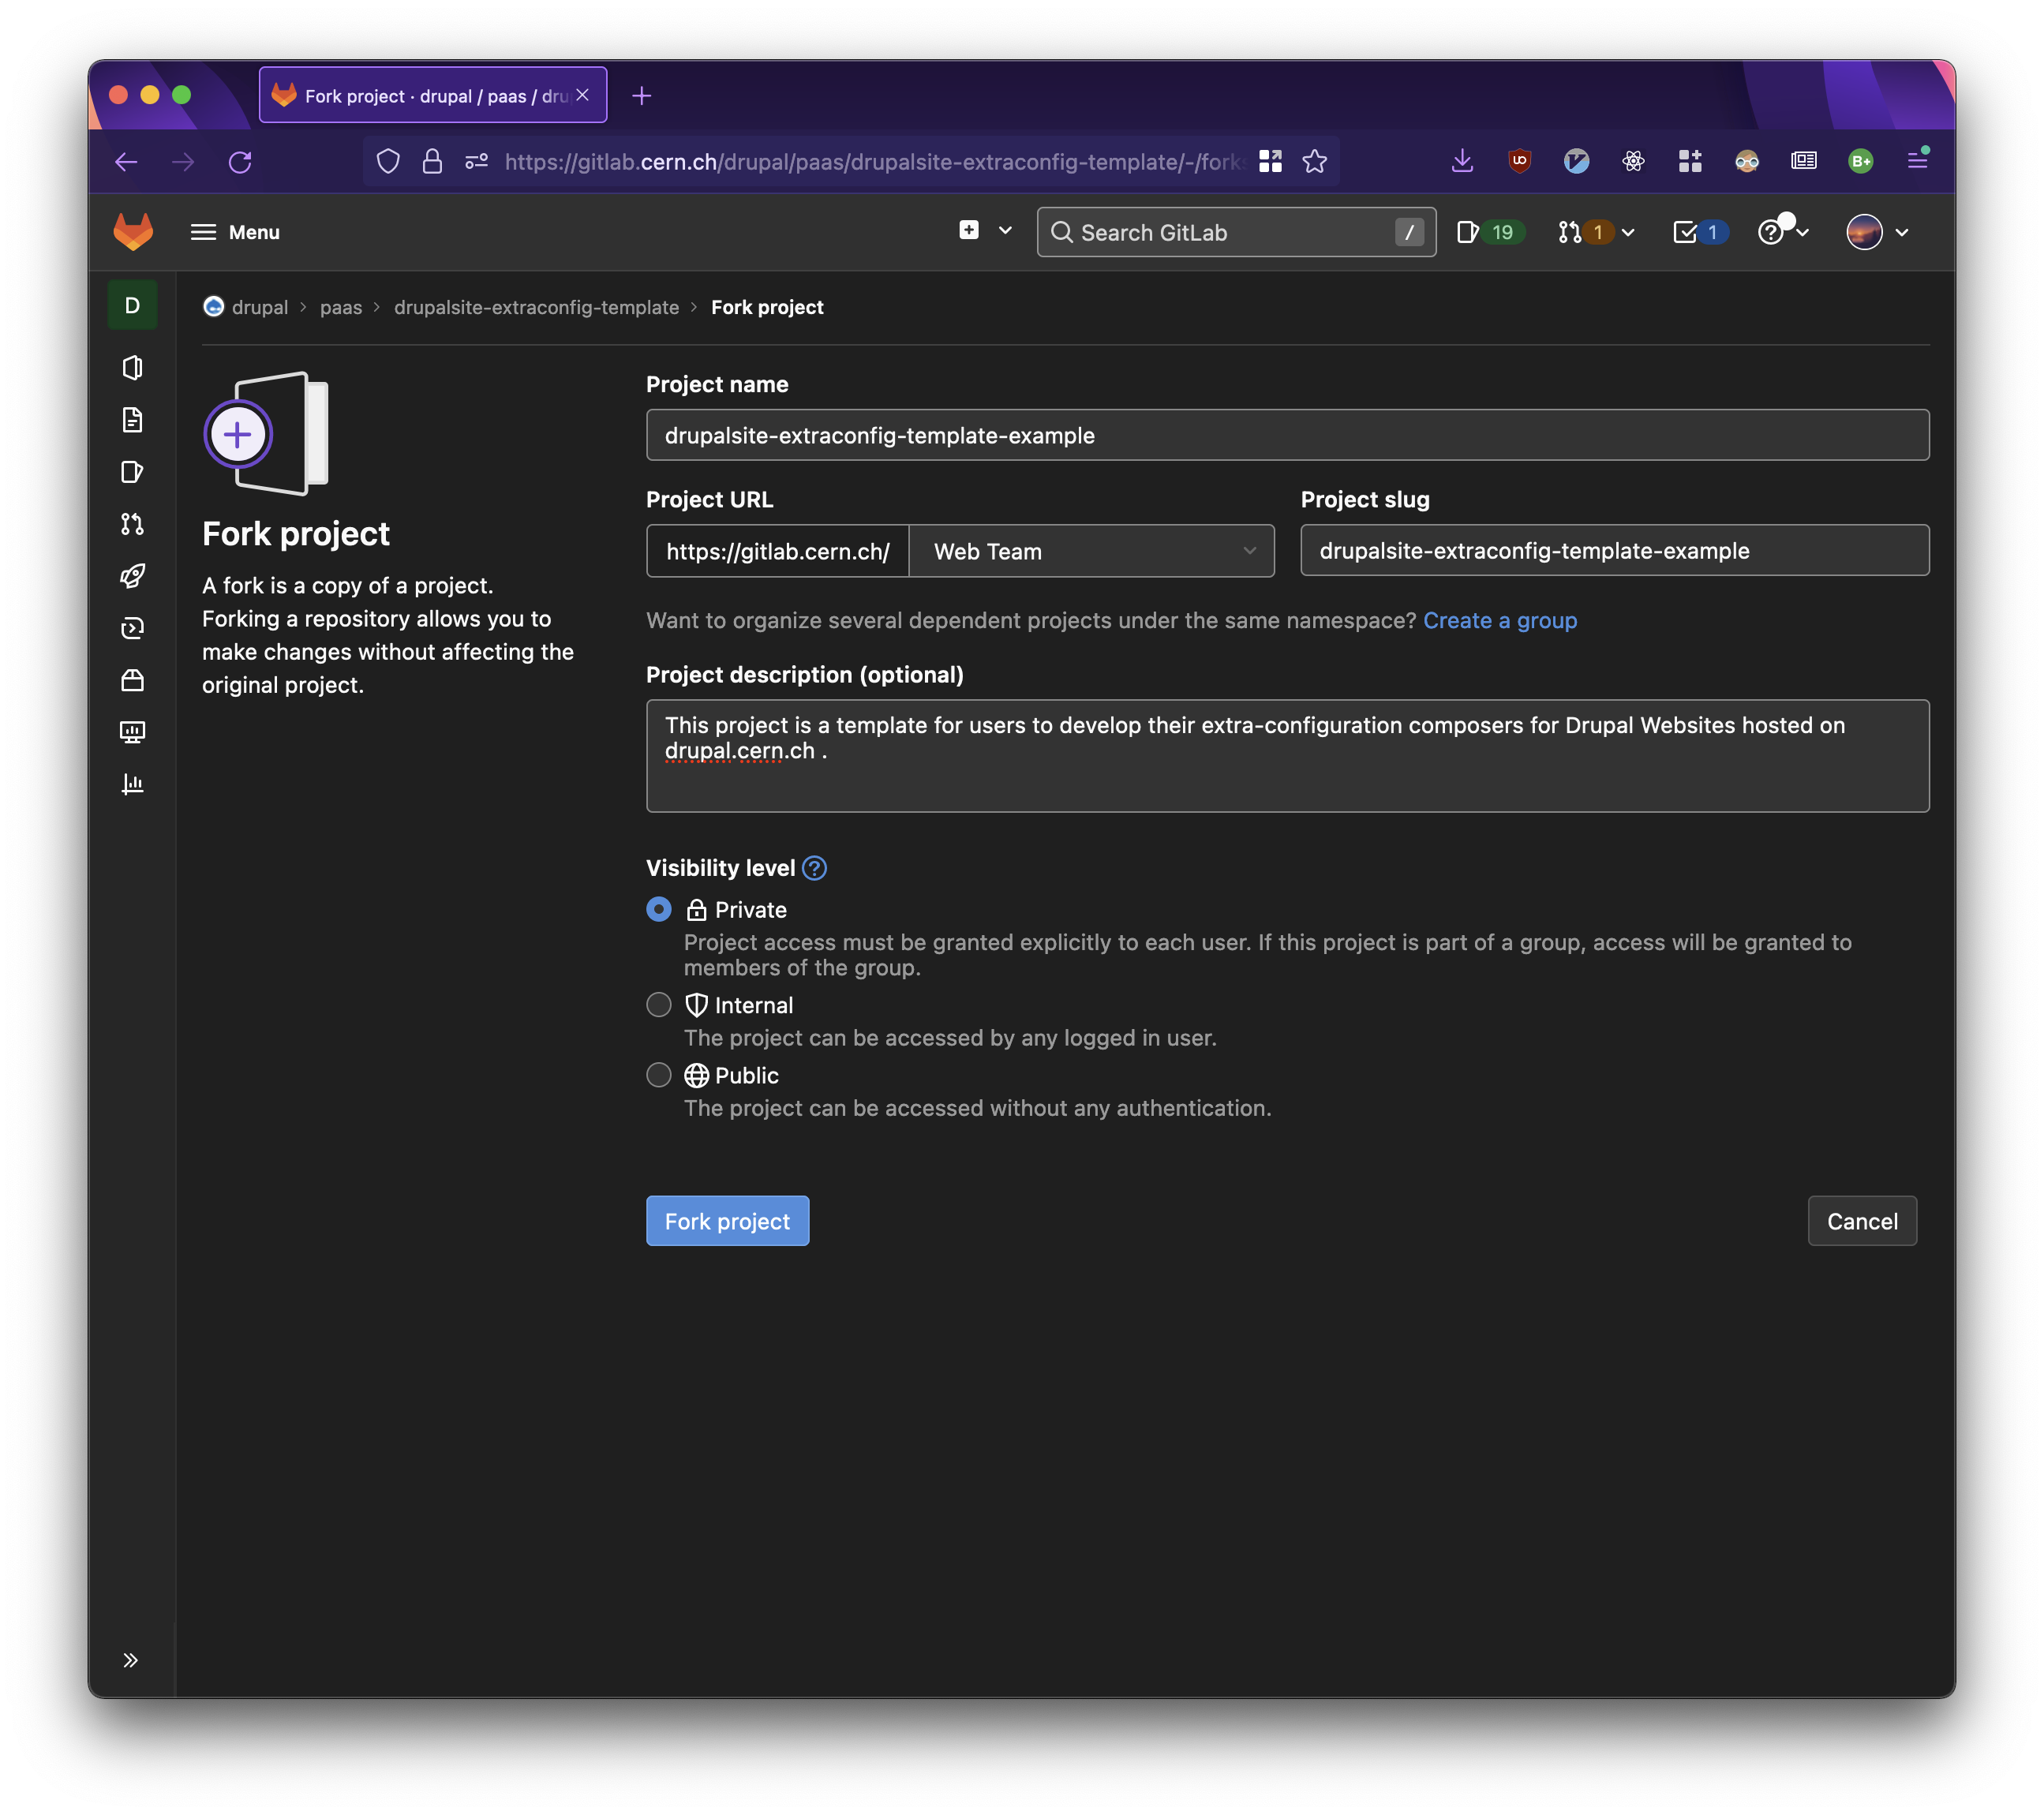
Forking the `drupalsite-extraconfig-template` repository.
Click Fork on the dedicated drupalsite-extraconfig-template repository to have a template to start from.
Please ensure that you create your new repository in an appropriate location such that yourself and anyone who needs to access can access.
Any custom composer.json must be hosted on the CERN infrastructure.
Thus, if you are working with third-party contractors, they must be assigned CERN accounts with access to Gitlab such that all code resides within CERN.
We do not recommend tying the repository to your personal CERN/Gitlab account.
Forking the `drupalsite-extraconfig-template` repository.
- Once the repository has been created, you are ready to proceed.
In order to install a custom module, it must be included as a composer dependency.
As an example, we will install the Better Exposed Filters module (https://www.drupal.org/project/better_exposed_filters).
This can be achieved by editing the composer.json file.
Kindly note that the following flow also applies to custom modules you develop yourself.
In such cases, please ensure that the module is hosted on the CERN infrastructure in a dedicated Gitlab repository such that access is ensured.
You must select a specific release of the module you wish to install.
Proceeding with Better Exposed Filters, we select version 6.0.1 (i.e. https://www.drupal.org/project/better_exposed_filters/releases/6.0.1) and copy the composer require statement. Note how ^6.0, as seen in the below screenshot, always allow non-breaking updates between, in this case, >= 6.0 < 7.0. Kindly refer to https://getcomposer.org/doc/articles/versions.md for more information about versioning and how to understand the various operators.
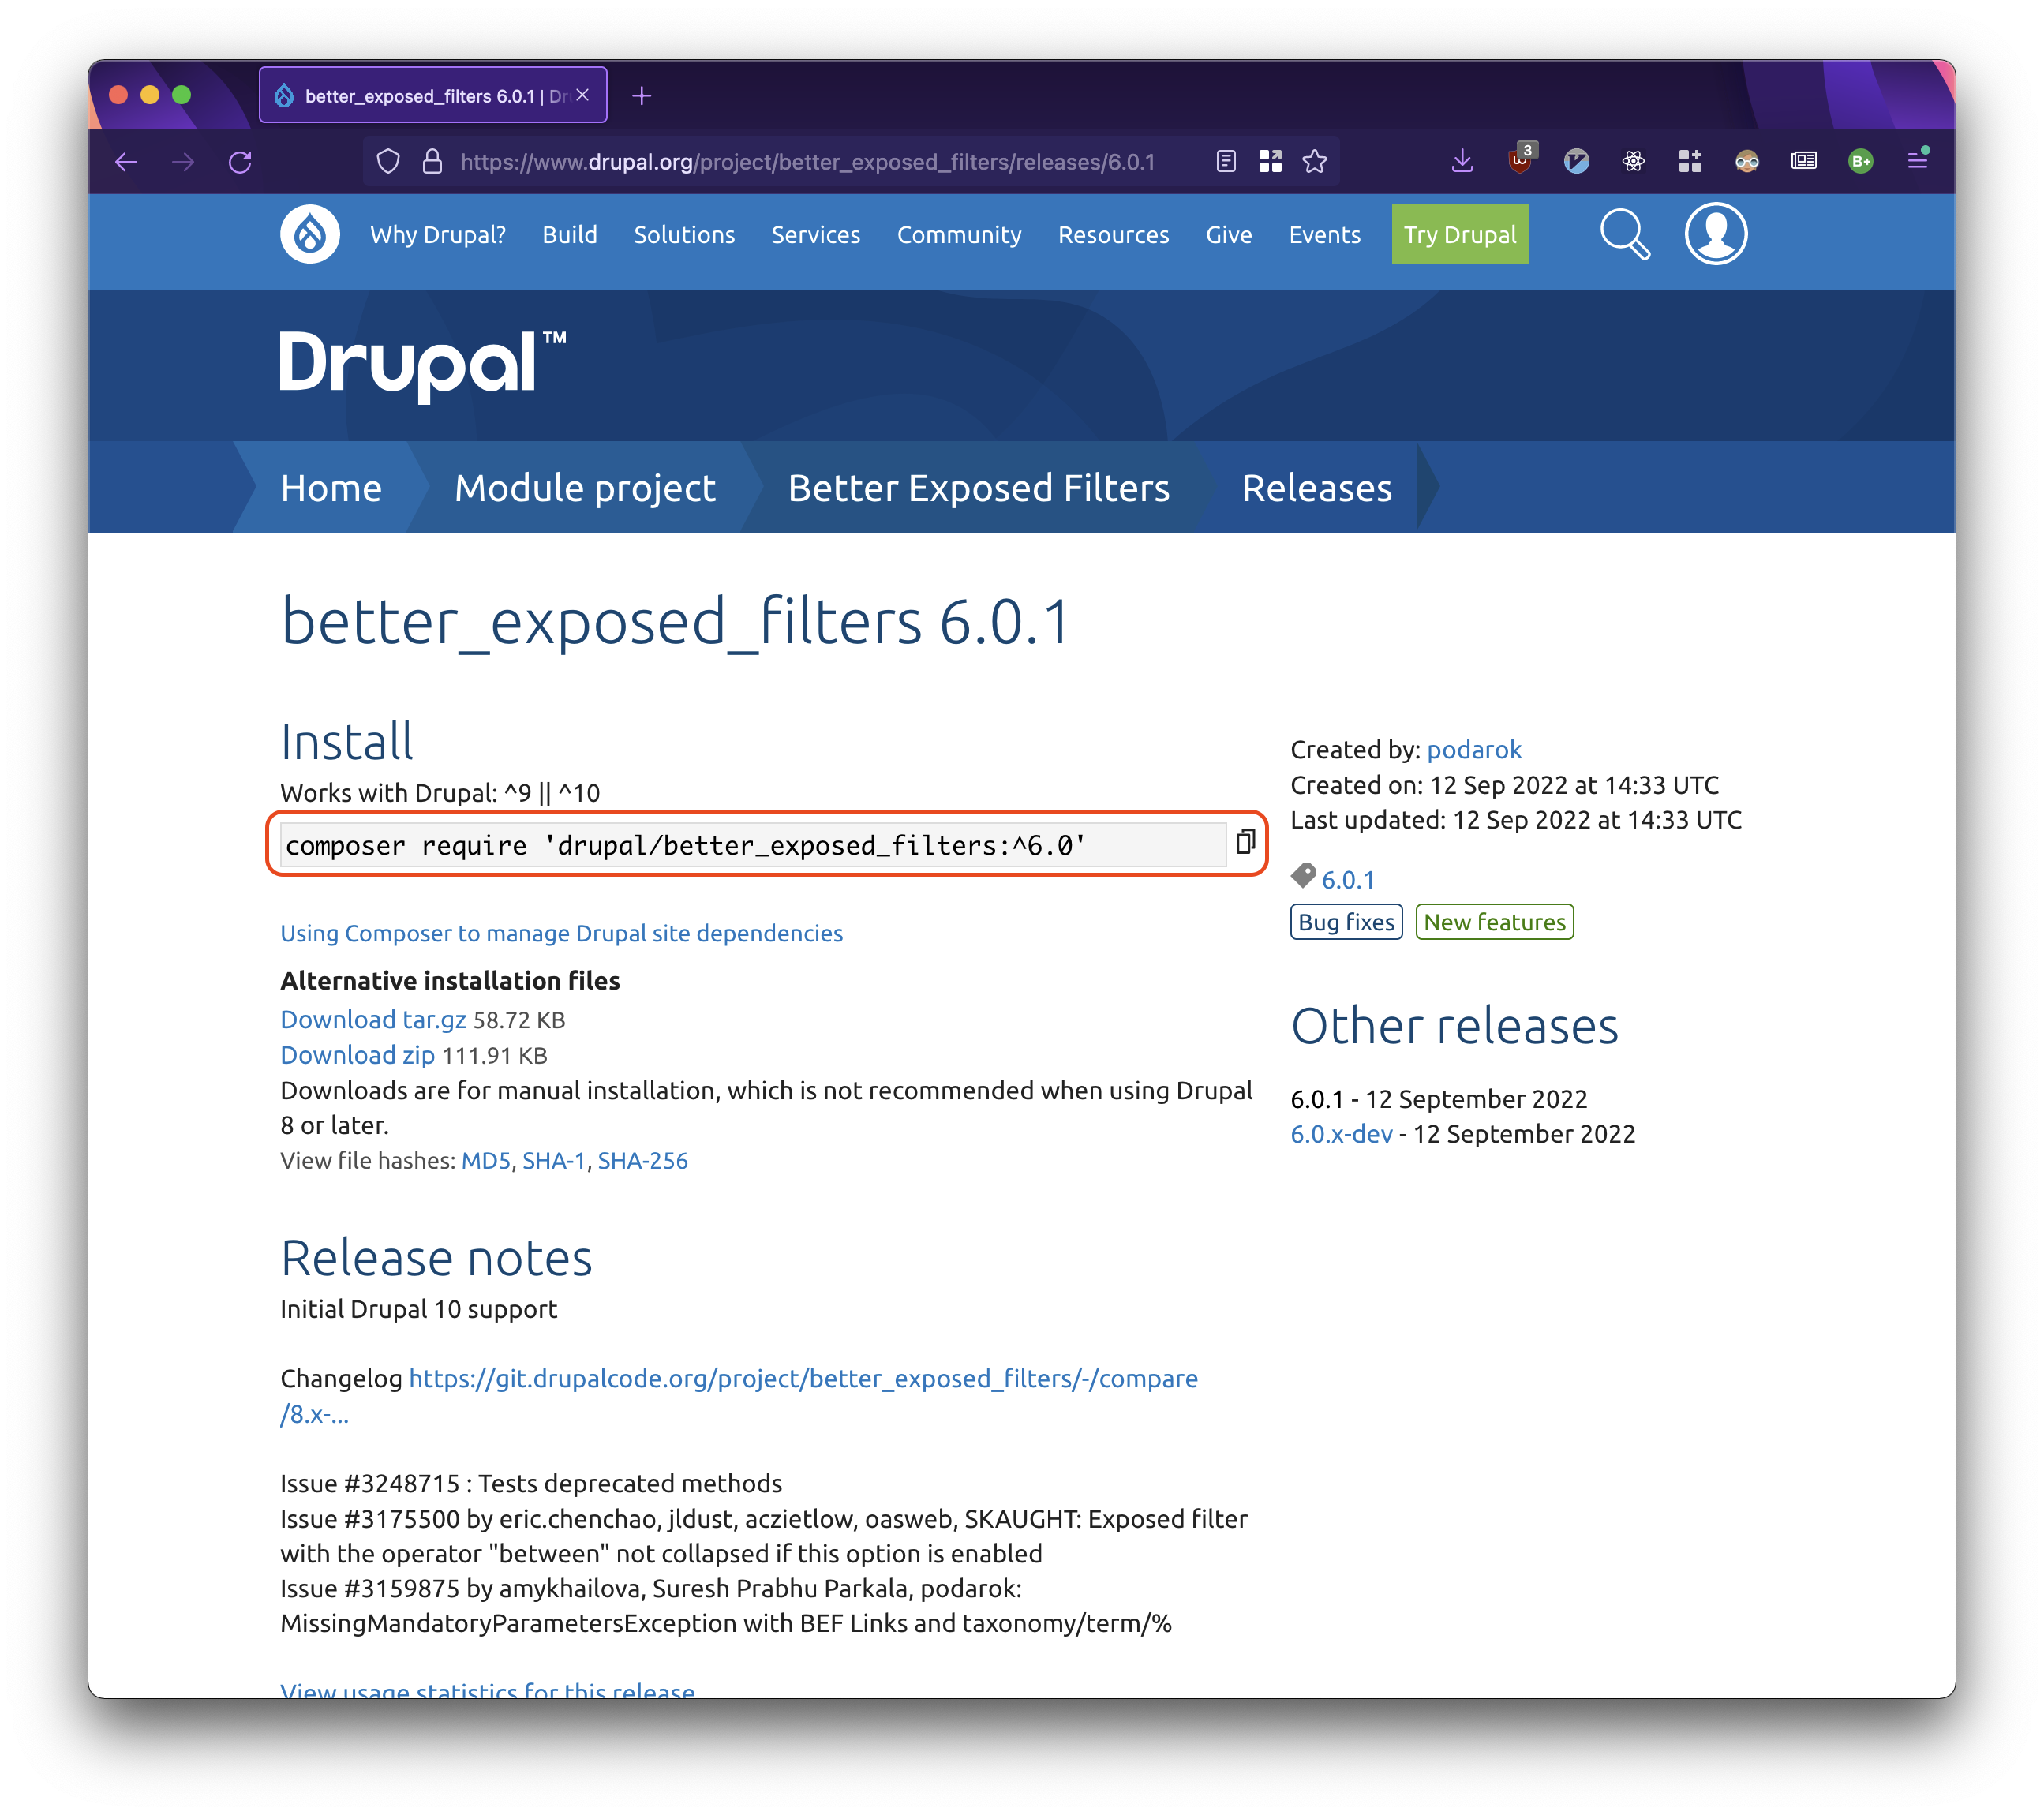
Copying the `composer require` statement.
- We proceed via Gitlab by clicking the
composer.jsonfile in our new repository.
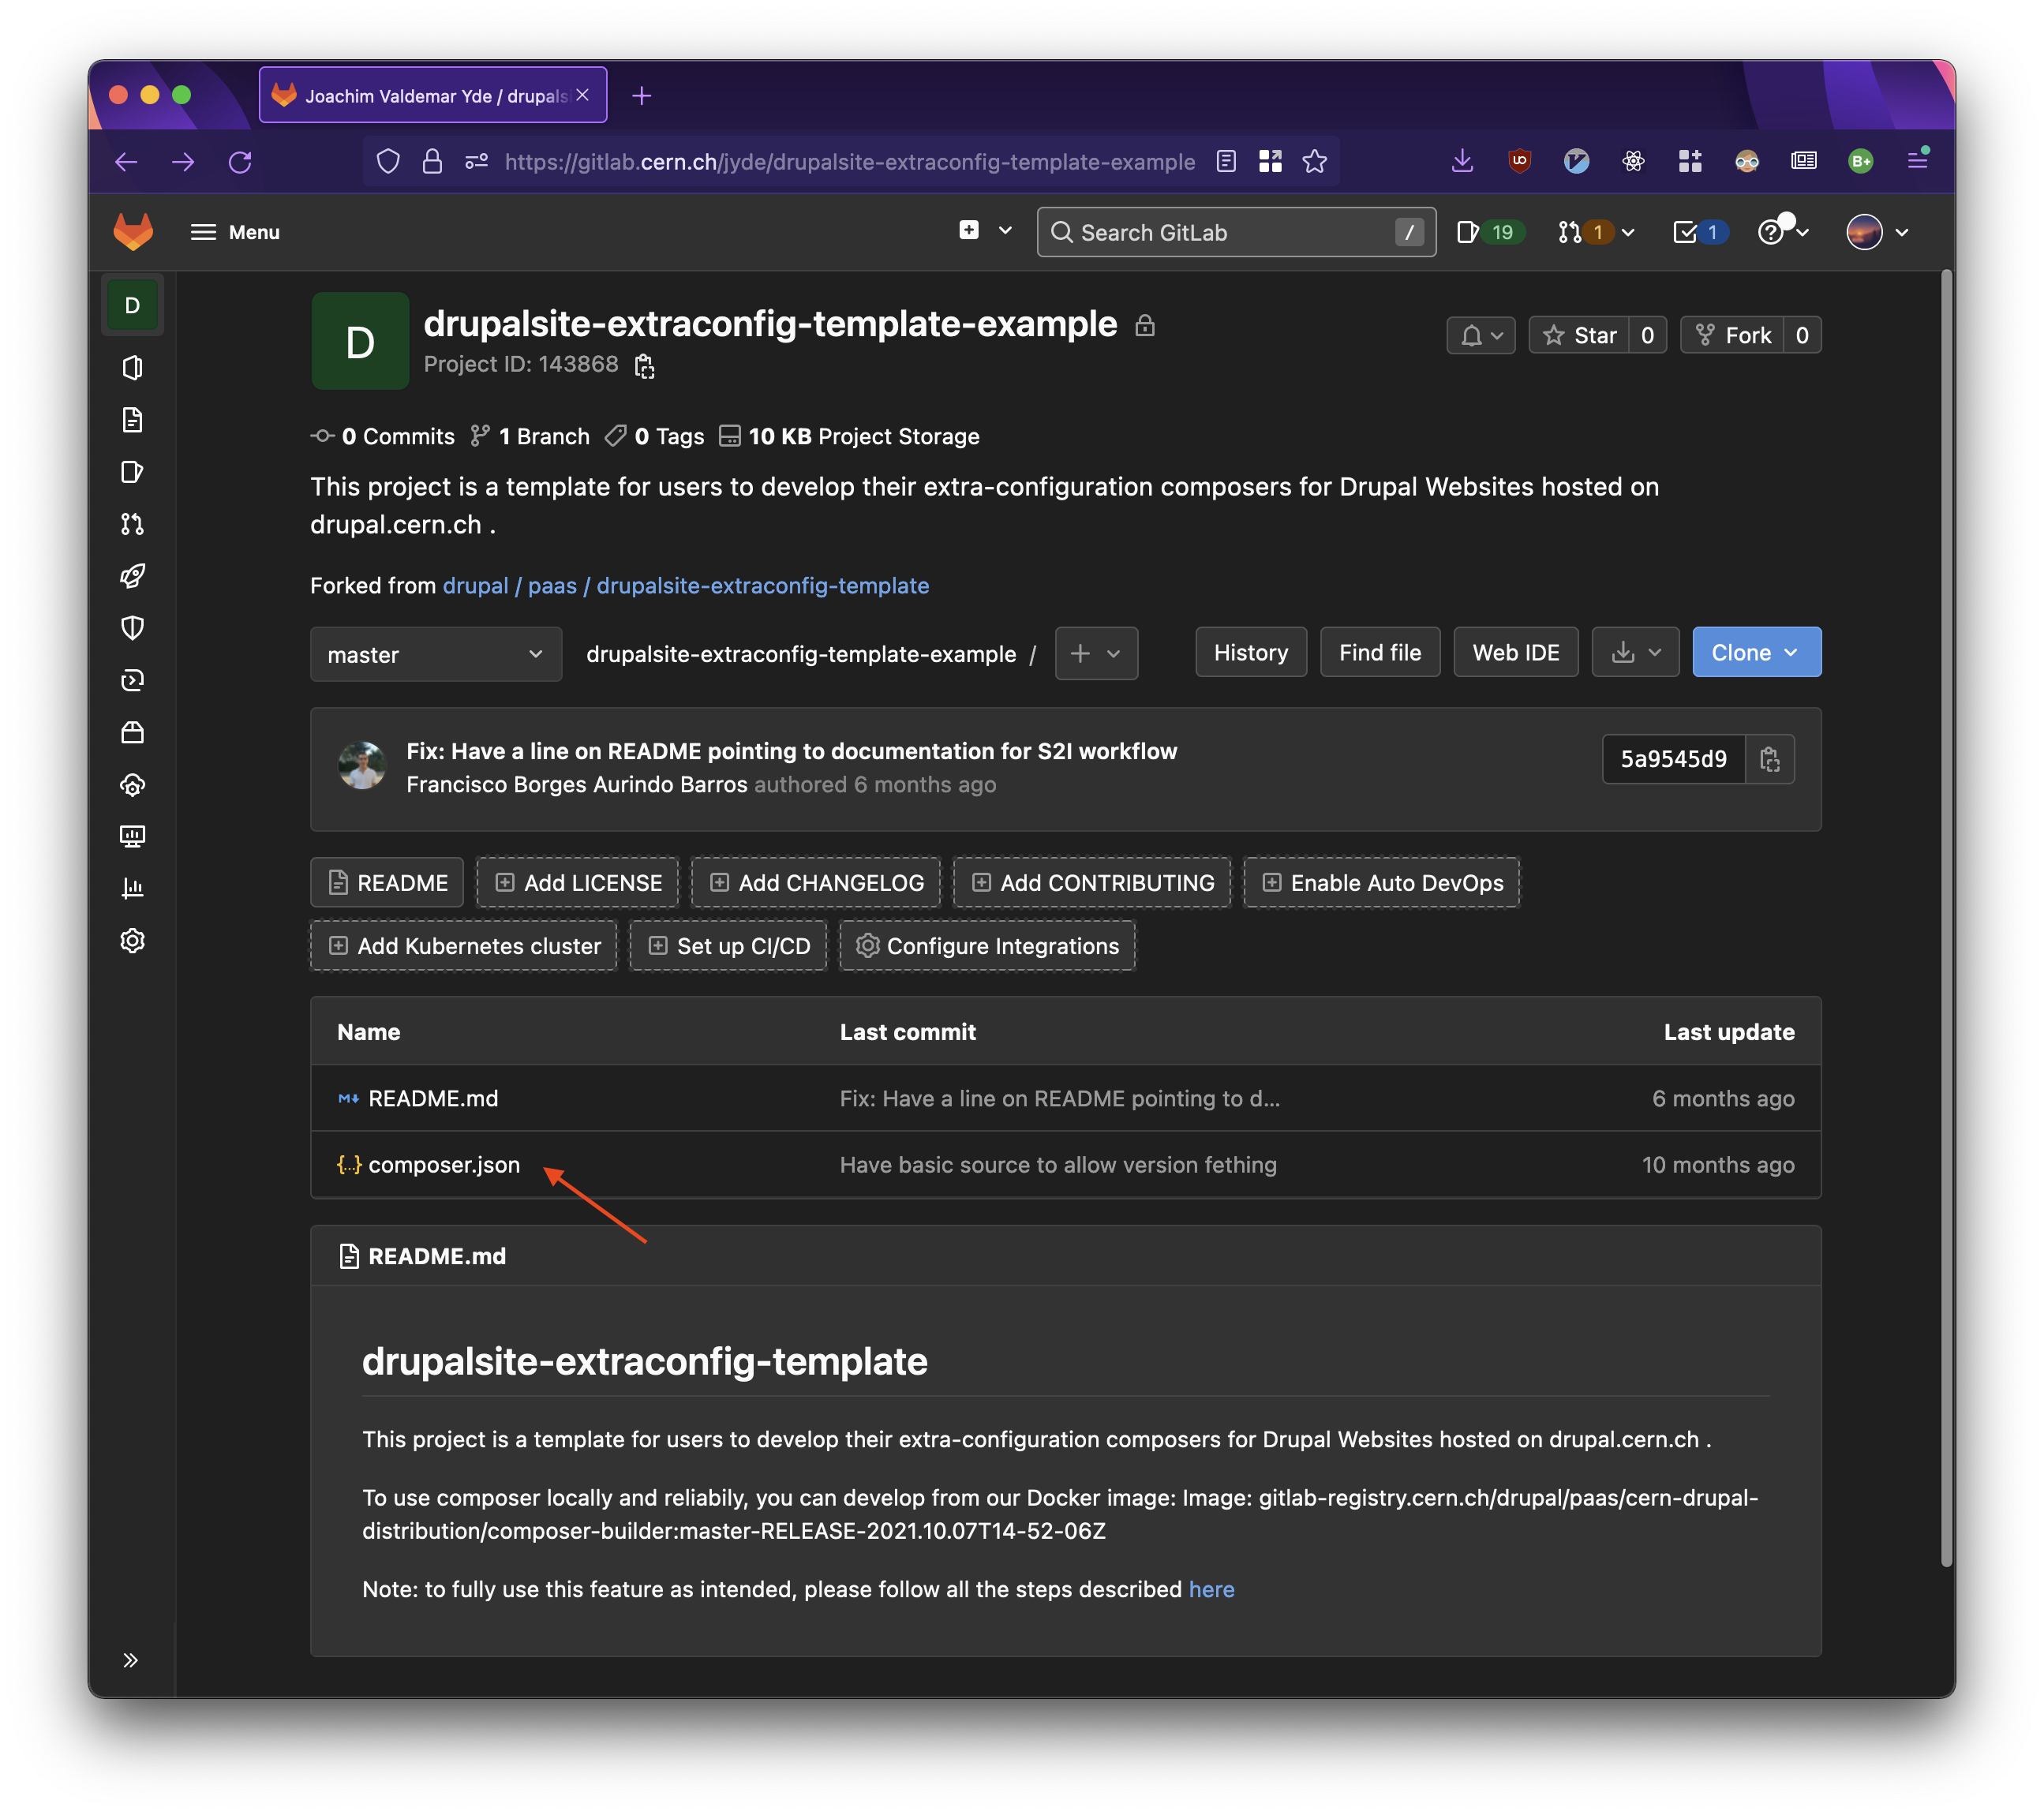
Editing the `composer.json` file directly.
Next, we create a new line using the composer require statement we copied in step 2.
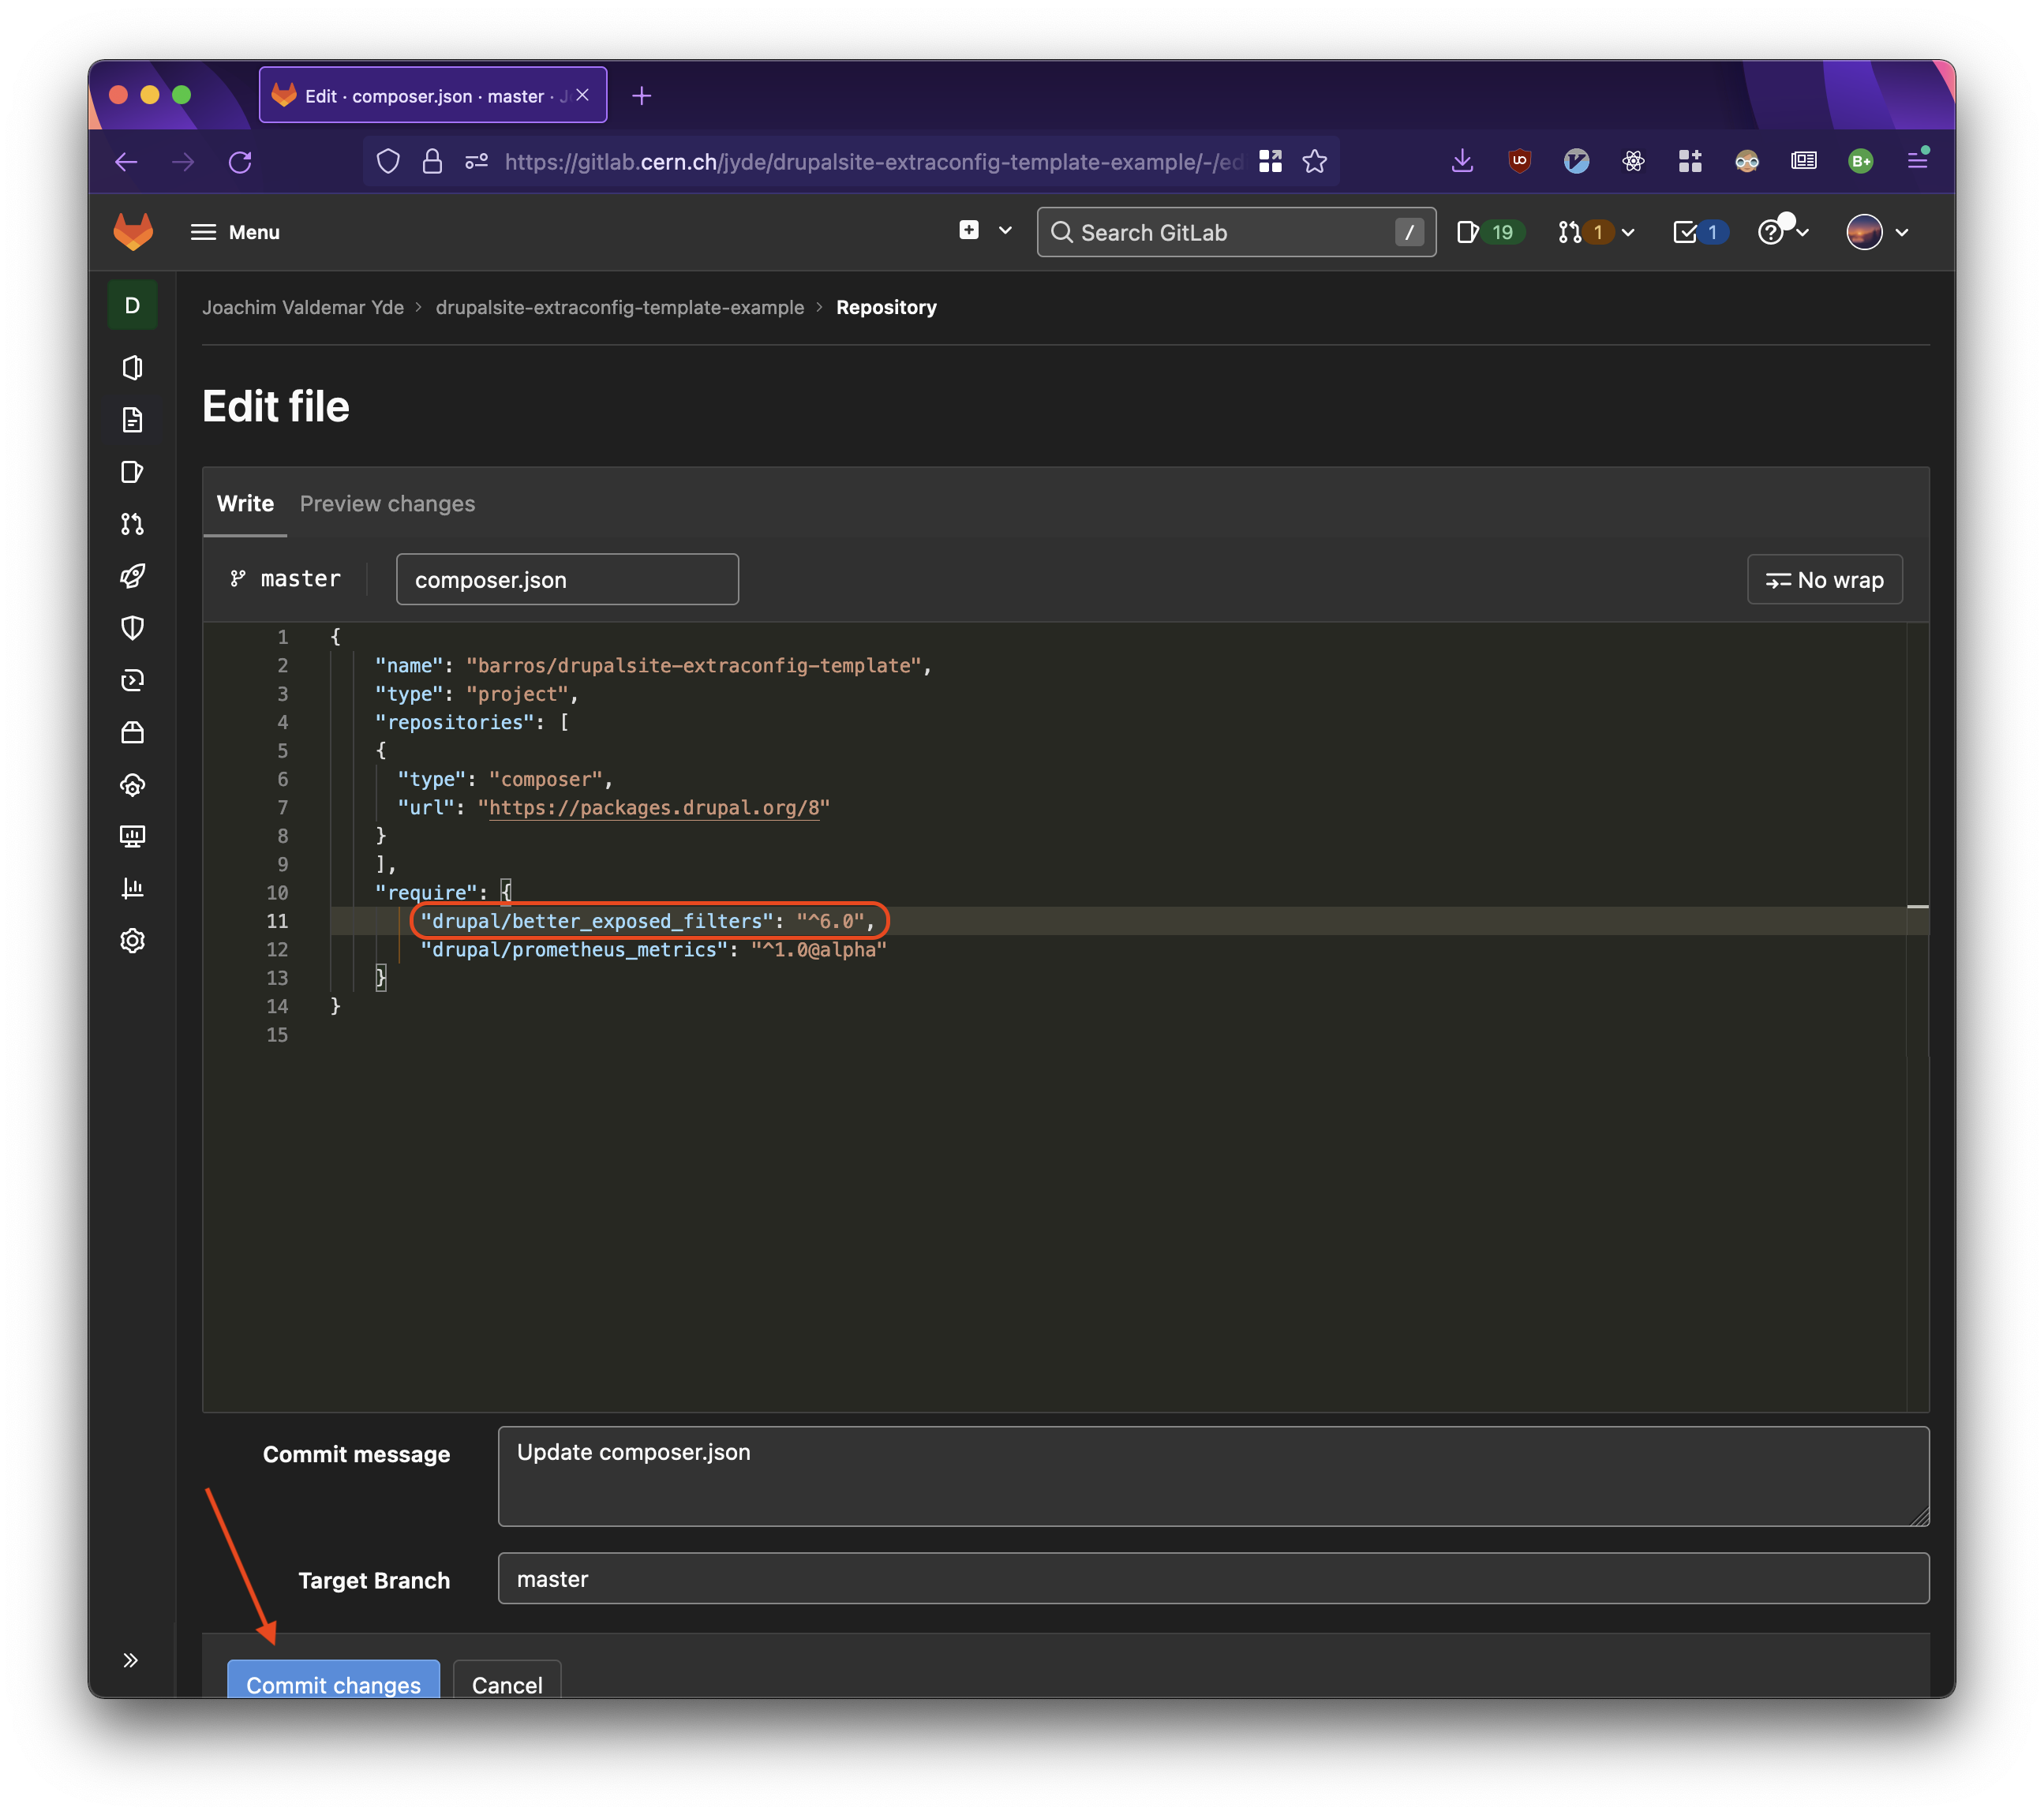
Editing the `composer.json` file directly.
In the above case, as no other module has been added, we merely edit line 11 to say "drupal/better_exposed_filters": "^6.0",.
Remember the , at the end to ensure the file remains valid JSON.
Once done, click Commit changes. Please ensure these changes are reflected on the main (previously master) branch.
If you are working on a development branch, you must merge to main before any changes are reflected on your website.

Editing the `composer.json` file directly.
Using Private Repositories
For security and / or privacy concerns, you may wish to use a private Gitlab repository.
We recommend using private repositories.
In order to do this, you need to create an Access Token on your Gitlab repository.
Use the following steps to generate an Access Token.
Remember to modify the Extra configs repo URL, too.
In the ‘Project Access Tokens’ page, complete the following fields
Token name: Provide a custom name here, which will be used to refer to the token usage. The name is not very important and can be something simple like drupalExpiration date: This can be left empty, for the token to never expire. Or you can set a custom date. Note that, if you set a custom date, the workflow might not work post the specific dateSelect a role: Select the reporter role from the dropdown listSelect scopes: In the scopes, make sure to only select read_repository checkbox
Click on the Create project access token button at the bottom.
This will refresh the page and display an Access token at the top of the page.
Make sure to copy and save this somewhere, as it is displayed only once.
If you lose the token, repeat the steps again to create a new one
Fill the Extra configs field
Follow the steps indicated under https://drupal.docs.cern.ch/development/okd-ui to access your project.
Click the YAML tab at the top.
- Fill the fields
branchandrepositoryUrlunderspec.configuration.extraConfigurationRepository. You may need to add them if they don't exist.
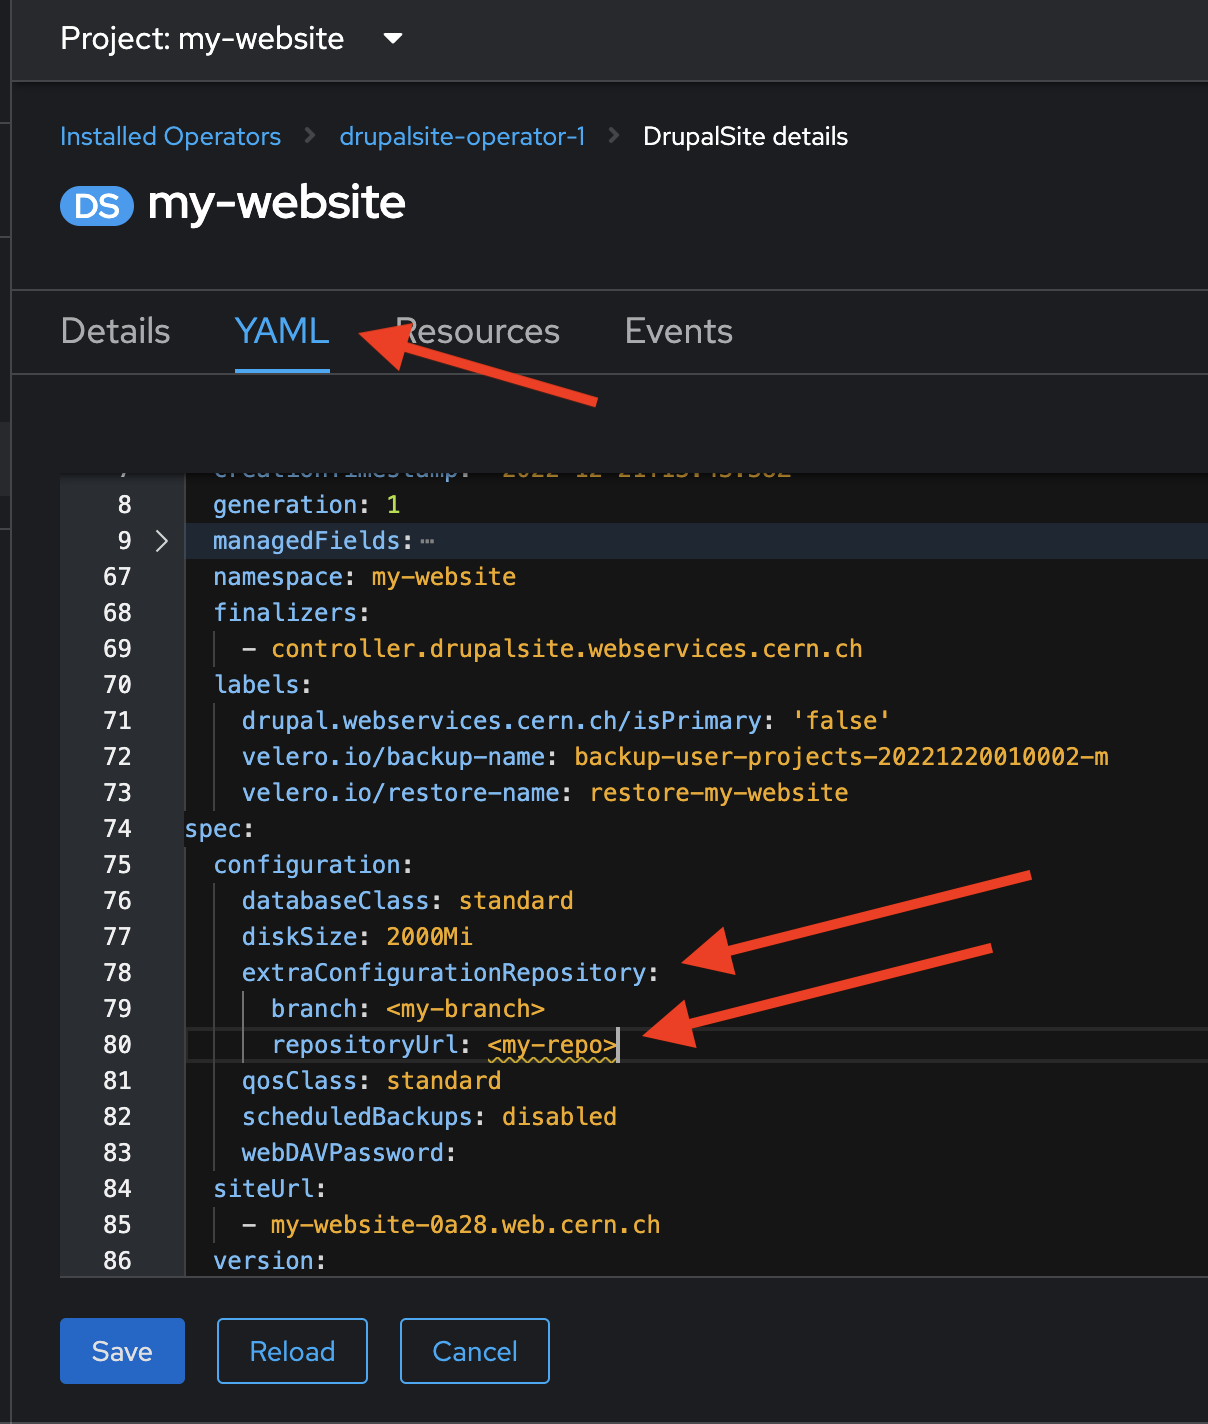
If you have a public repository, you can provide your Gitlab URL in the repositoryUrl field.
However, if you have a repository that is not public, in the repositoryUrl field, add username:accesstoken after https:// and before gitlab.cern.ch, e.g. https://<YOUR_ACCOUNT_NAME>:x-CjgFJxkxxDTuctAm8jG@gitlab.cern.ch/<YOUR_ACCOUNT_NAME>/<YOUR_GIT_REPOSITORY>.git.
Add Webhook Triggers
In order for changes committed to your Gitlab repository to be reflected on the website, i.e. for new builds to be created, this step is important.
From your site management page, on the website you just created, find the Webhook URL listed and copy it.
The URL can be found under the Advanced-tab of the environment in the Webservice Portal.
If you do not see an URL, you must ensure that you have the appropriate permissions and submit a ticket.
On your Gitlab repositry, go to Settings > Webhooks.
You will find these in the navigation bar on the left.
Paste the URL you copied in the URL field and make sure only Push Events is checked in the Trigger section.
Also uncheck the Enable SSL verification in the SSL verification section.
Click on Add webhook image.
With this setup, every time you push a commit to your repository, a new build will be built and deployed to your website.