[LEGACY] Update Custom Modules
As of 10th of April 2024, the Drupal service no longer supports the installation of community-contributed, or custom modules and themes for new websites. See OTG0149420 for more details. The existing documentation is kept solely to assist for websites existing before 10 April 2024.
In the event that the modules provided via the CERN Drupal Distribution) are not sufficient for your needs, you may:
- post on the CERN Drupal Community Forums to see whether others have already achieved what you are looking for;
- submit a request to the Drupal Team to evaluate whether the feature(s) you require can be accommodated by adding a new module to the CERN Drupal Distribution, benefitting all CERN websites; or
- manually install a custom module directly on your website(s).
Please note that installing and using custom modules requires both (a) continuous maintenance and (b) continuous attention to updates, security patches, and new feature releases. Indeed, any website is a living and breathing piece of software. This work will solely be the responsibility of the website owner(s) as any custom module not in the CERN Drupal Distribution will not benefit from the centrally managed updates. If you require a set-and-forget solution, please do not exceed what is offered in the CERN Drupal Distribution.
Updating Modules
There are two ways in which modules can be updated, via (1) WebDAV, or (2) via oc.
In any case, the process of updating a module must be completed by the website owner(s) directly.
It is strongly recommended to always create a clone before attempting to update a module.
If all goes well on the clone, steps should be repeated on your production website.
In both webdav and composer, users need to execute drush updb inside the running pod/container to ensure all configurations are updated.
Complete the process by typing drush cr.
See the following docs to learn how to run commands inside a specific website.
Updating Modules via WebDAV
We recommend experienced users to use oc and the composer directly.
If you are unsure how to connect to your website's WebDAV, please refer to this guide.
The below screenshot shows an example of a mounted WebDAV folder. All CERN websites share this structure.
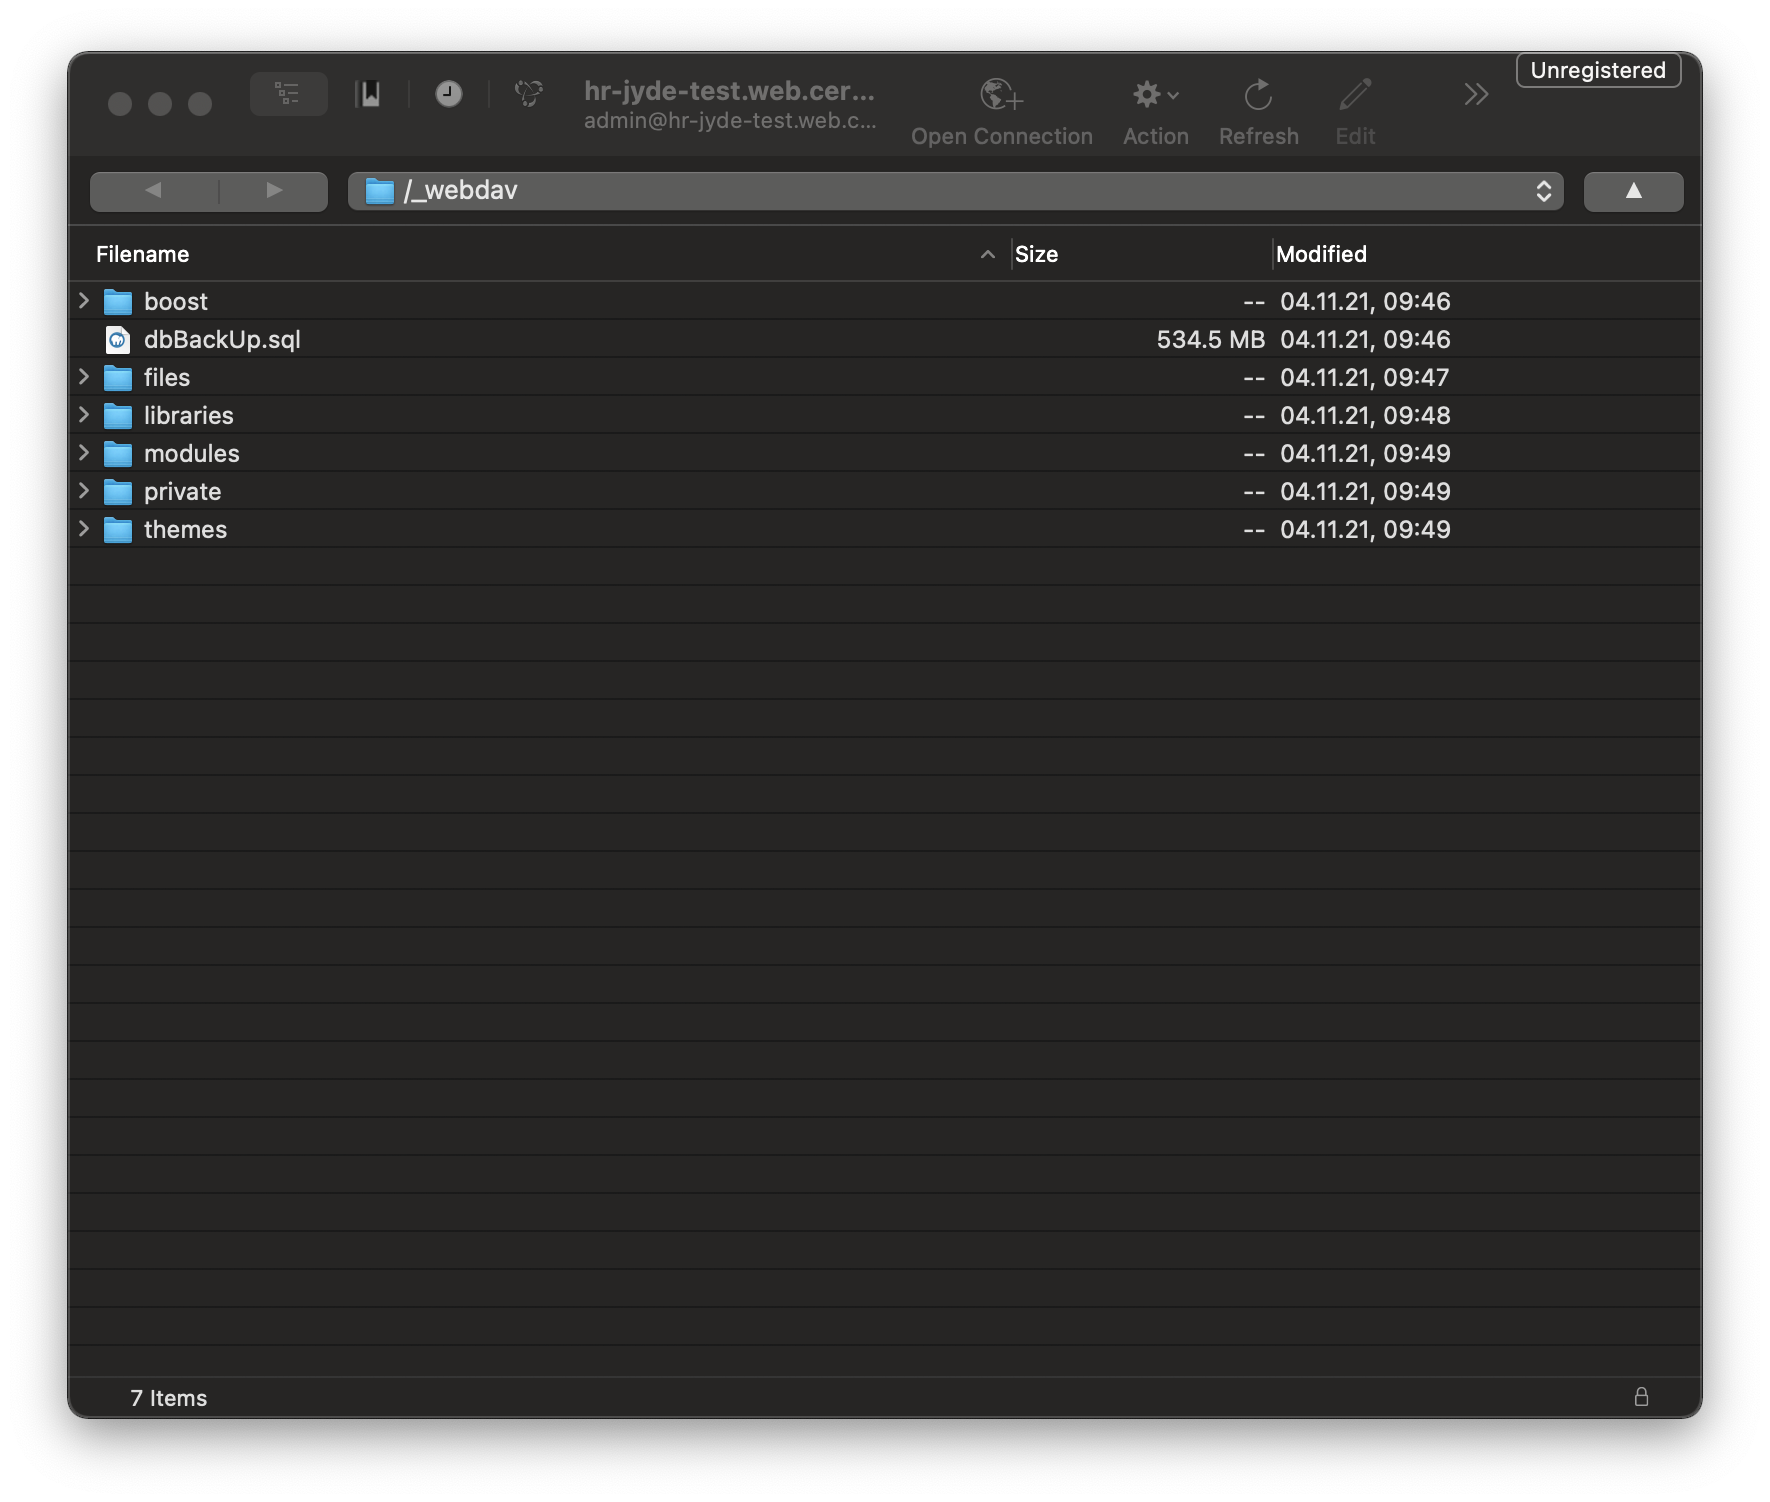
A mounted WebDAV folder of a CERN website.
Navigate to the modules folder.
This folder contains all the modules currently installed on your website.
Kindly note that the names of the folders correspond to the machine names of the modules. Do not change these.

The modules folder of a CERN website.
At this stage, we need a local copy of the module we wish to update. There are several ways in which this can be obtained; this guide will the two most common: The Extend tab and the Upgrade Status report. If you already happen to have a local copy of the module you wish to update, kindly skip the next two sections.
Using the Extend Tab
- Go through the Extend tab and select Update. On this page, all modules with new(er) releases are listed.
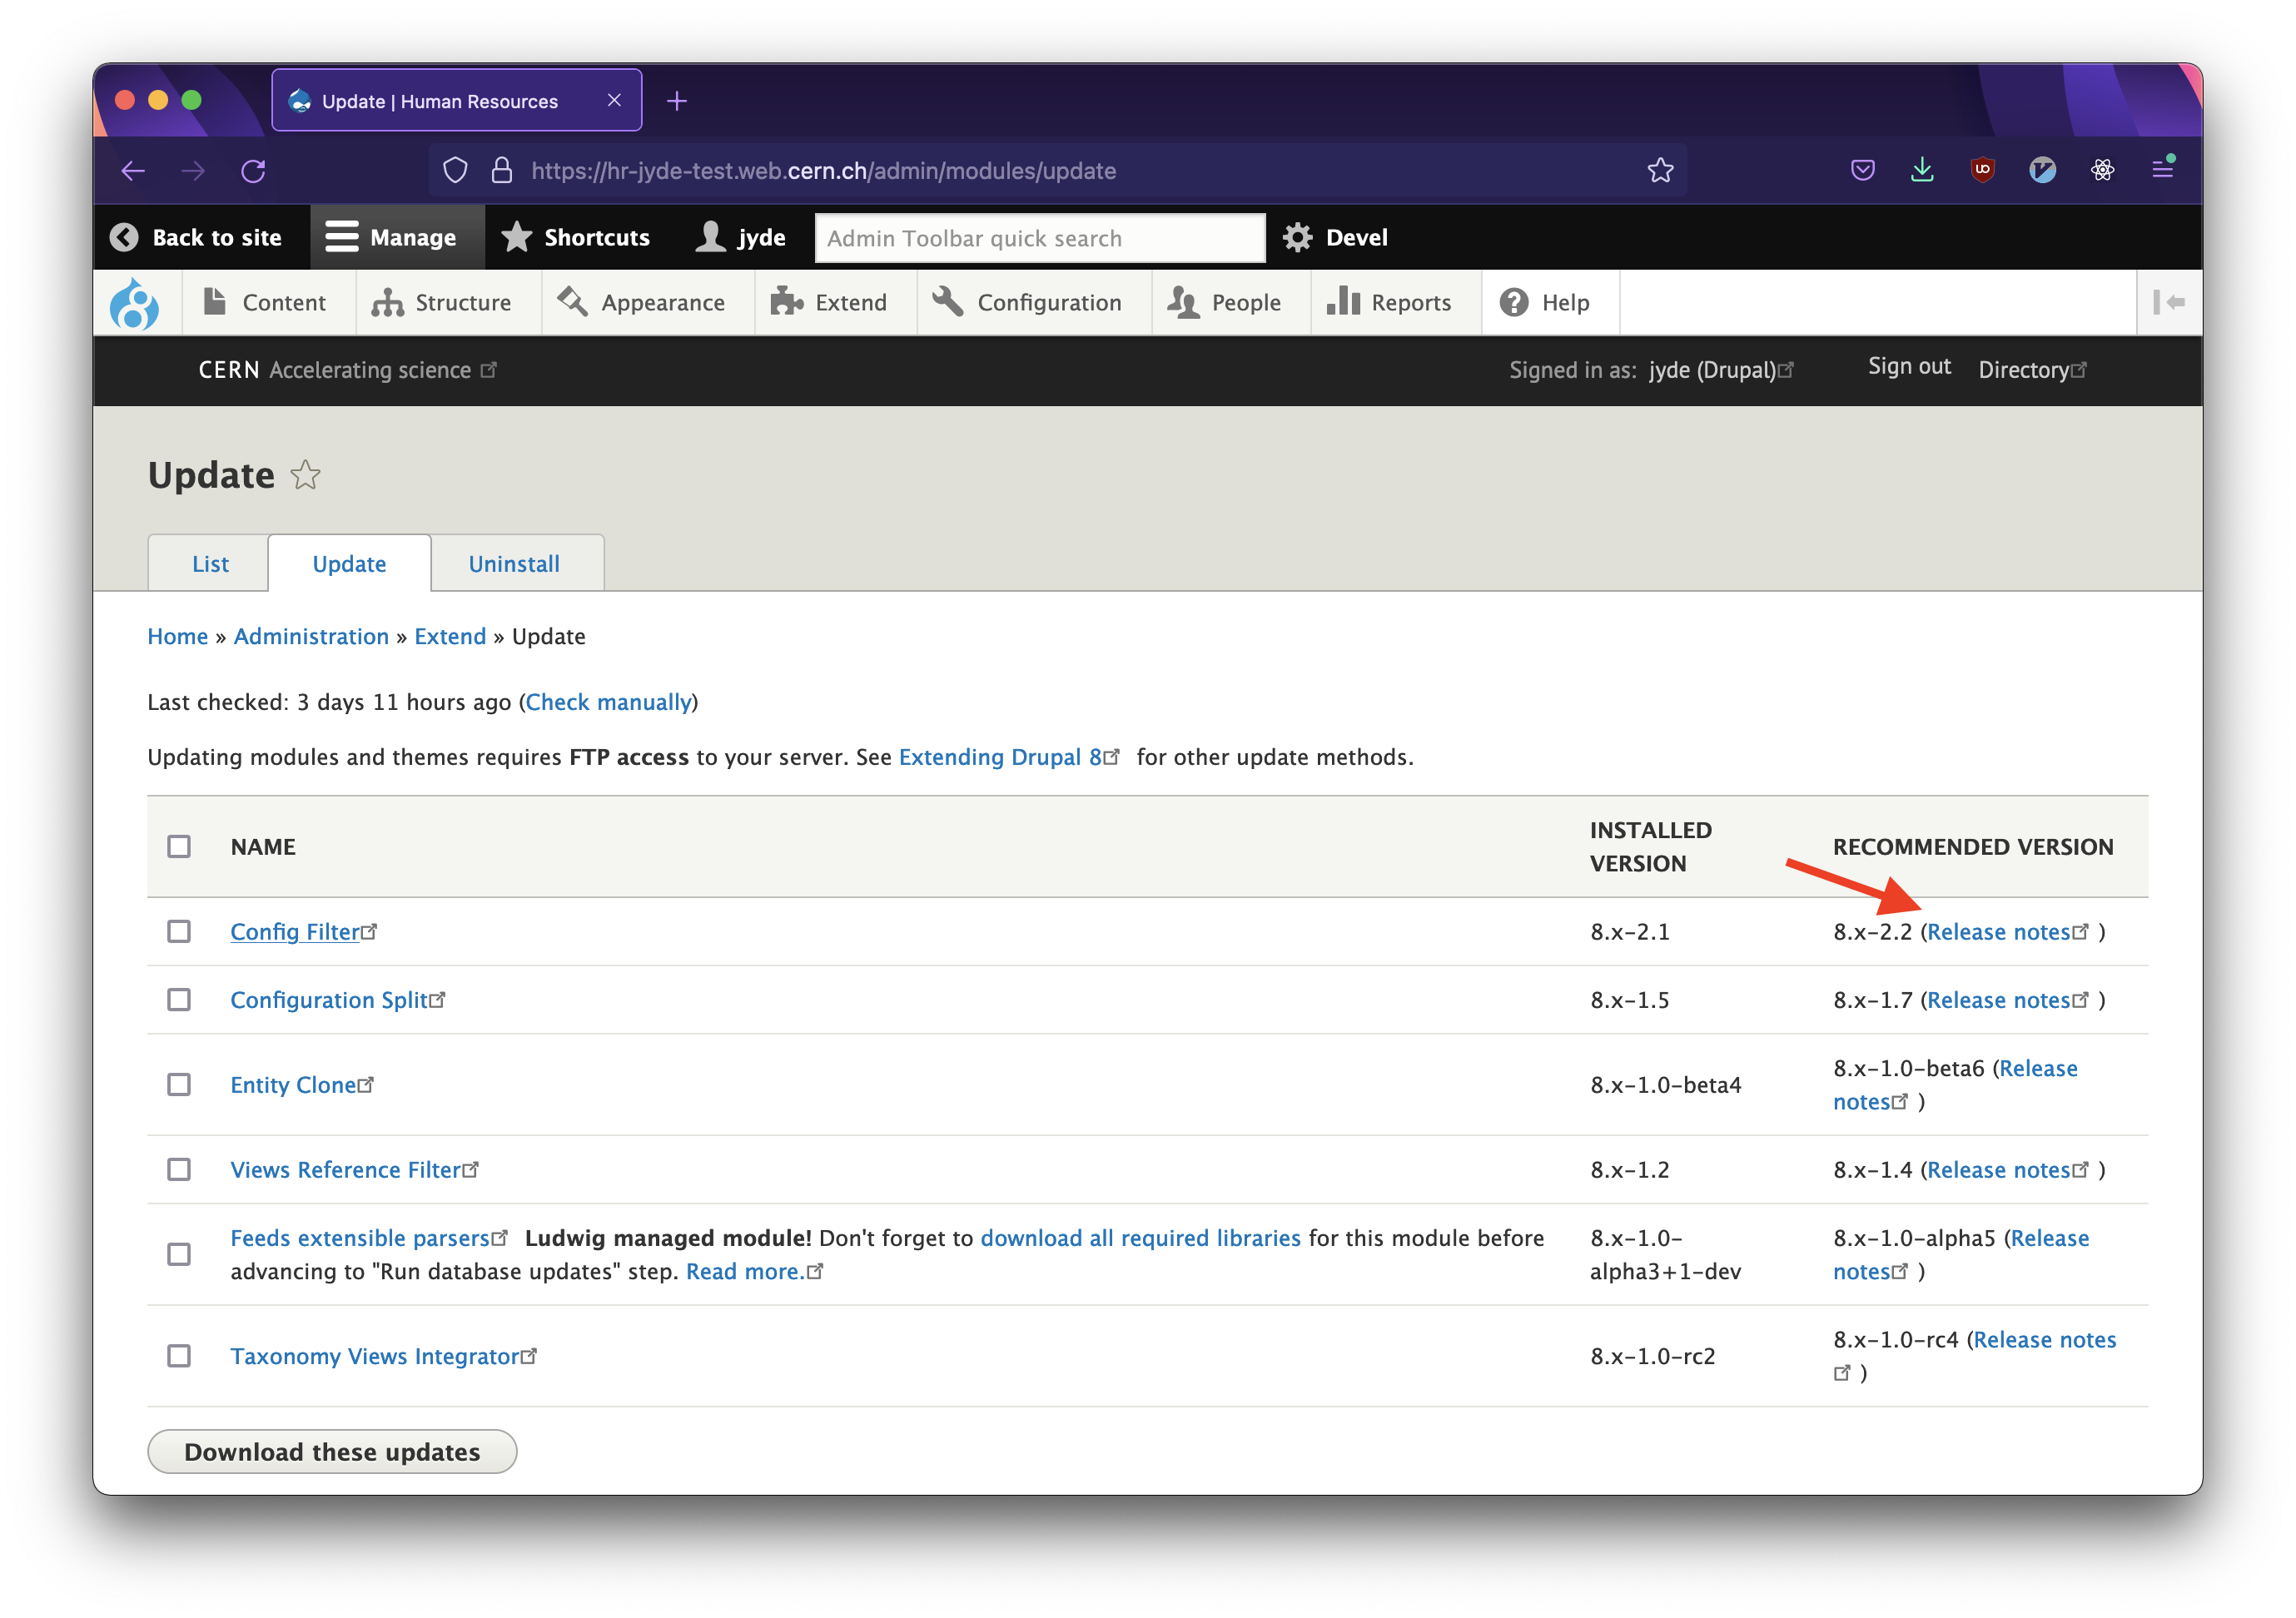
The Update tab under Extend.
- Click the Release notes link.
In this case, we proceed with the
config_filtermodule.
This opens a new tab or window in which the specific release can be downloaded directly. Choose the .zip version.

Downloading a copy of a module.
Using the Upgrade Status Report
Another way of obtaining the most recent release of a specific module is to use the Upgrade Status report:
- Access this by heading to Report and selecting the Upgrade Status report at the bottom.
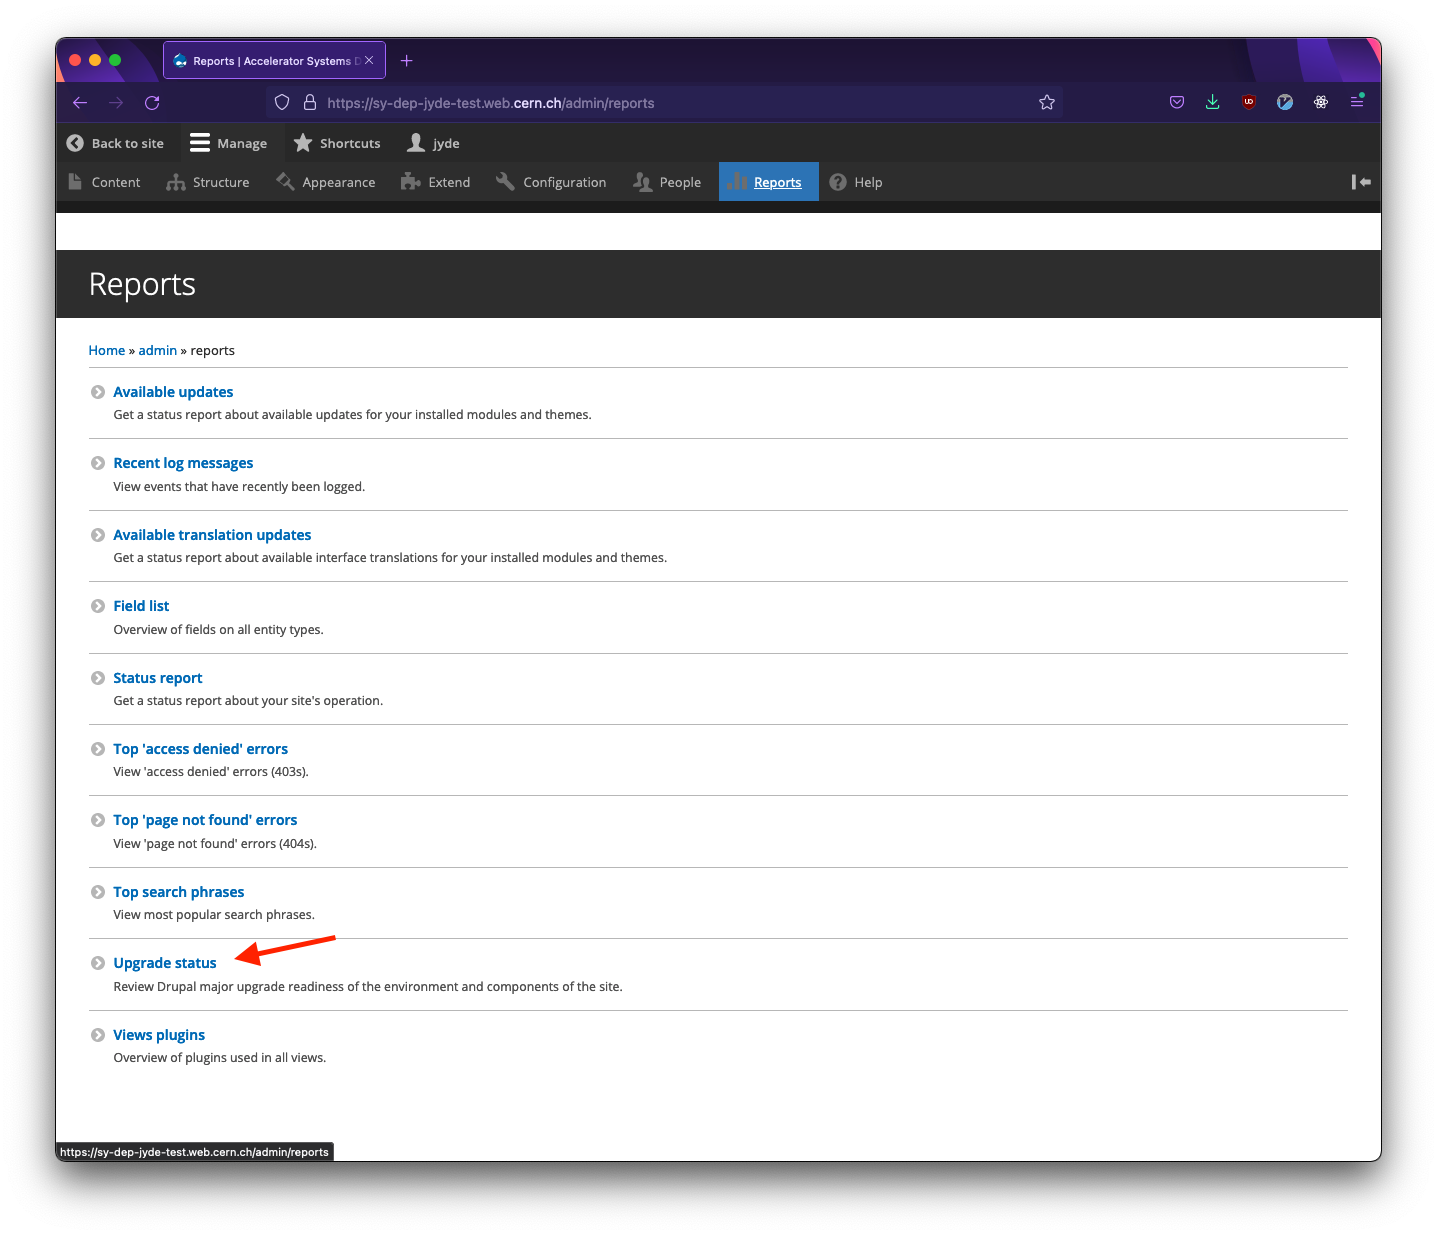
The Reports tab.
- Scroll to the Update section to identify modules in need of update(s).
In this case, we only have the quick_node_clone module marked as in need of an update.
Click on the Drupal.org version number.
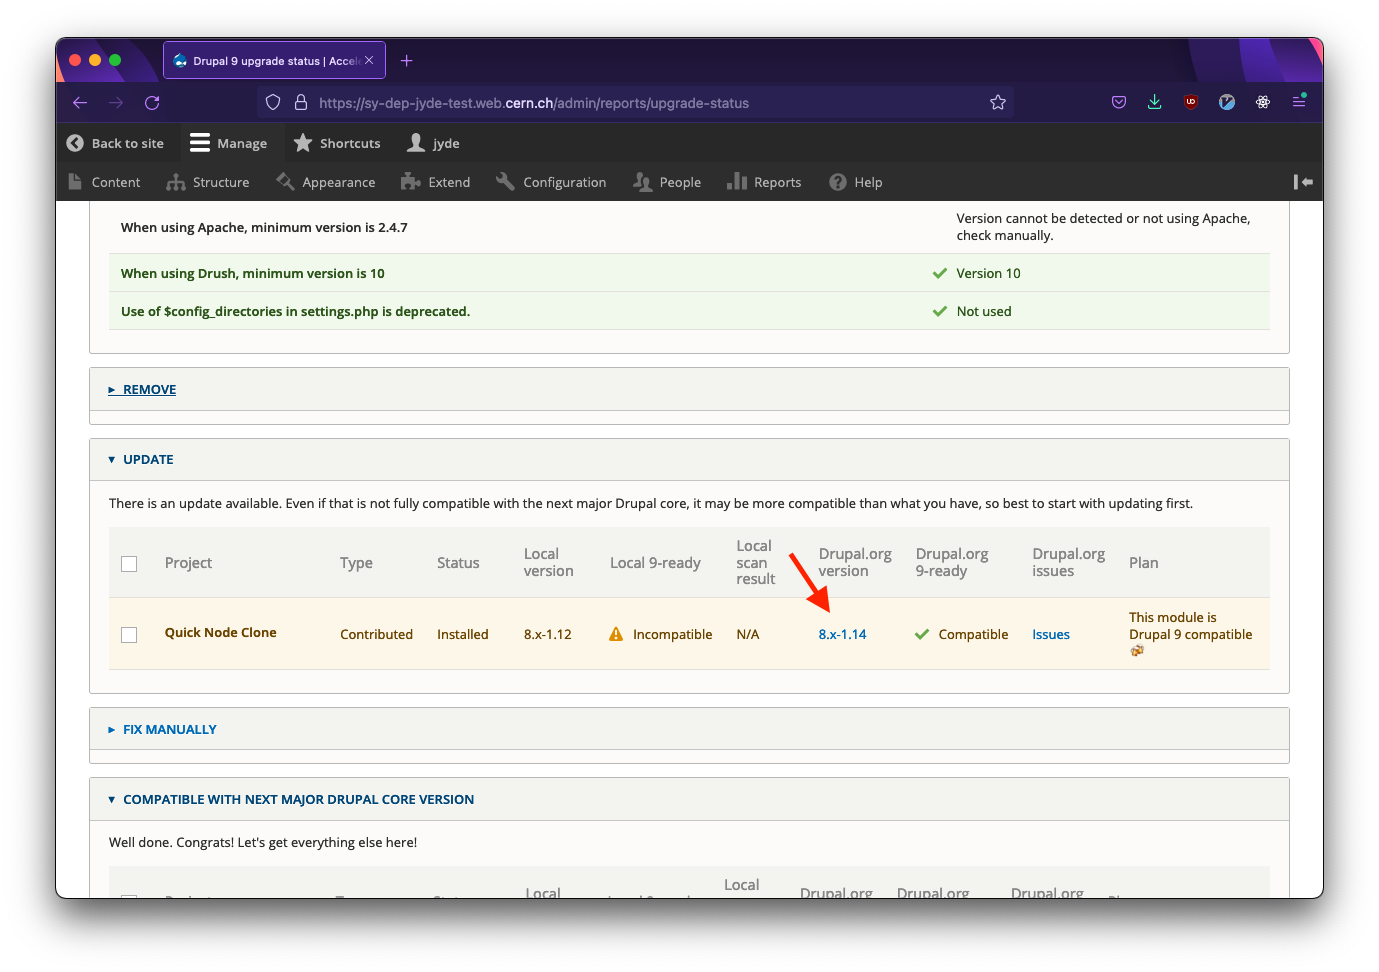
Selecting a specific module.
This opens a new tab or window in which the specific release can be downloaded directly. Choose the .zip version.
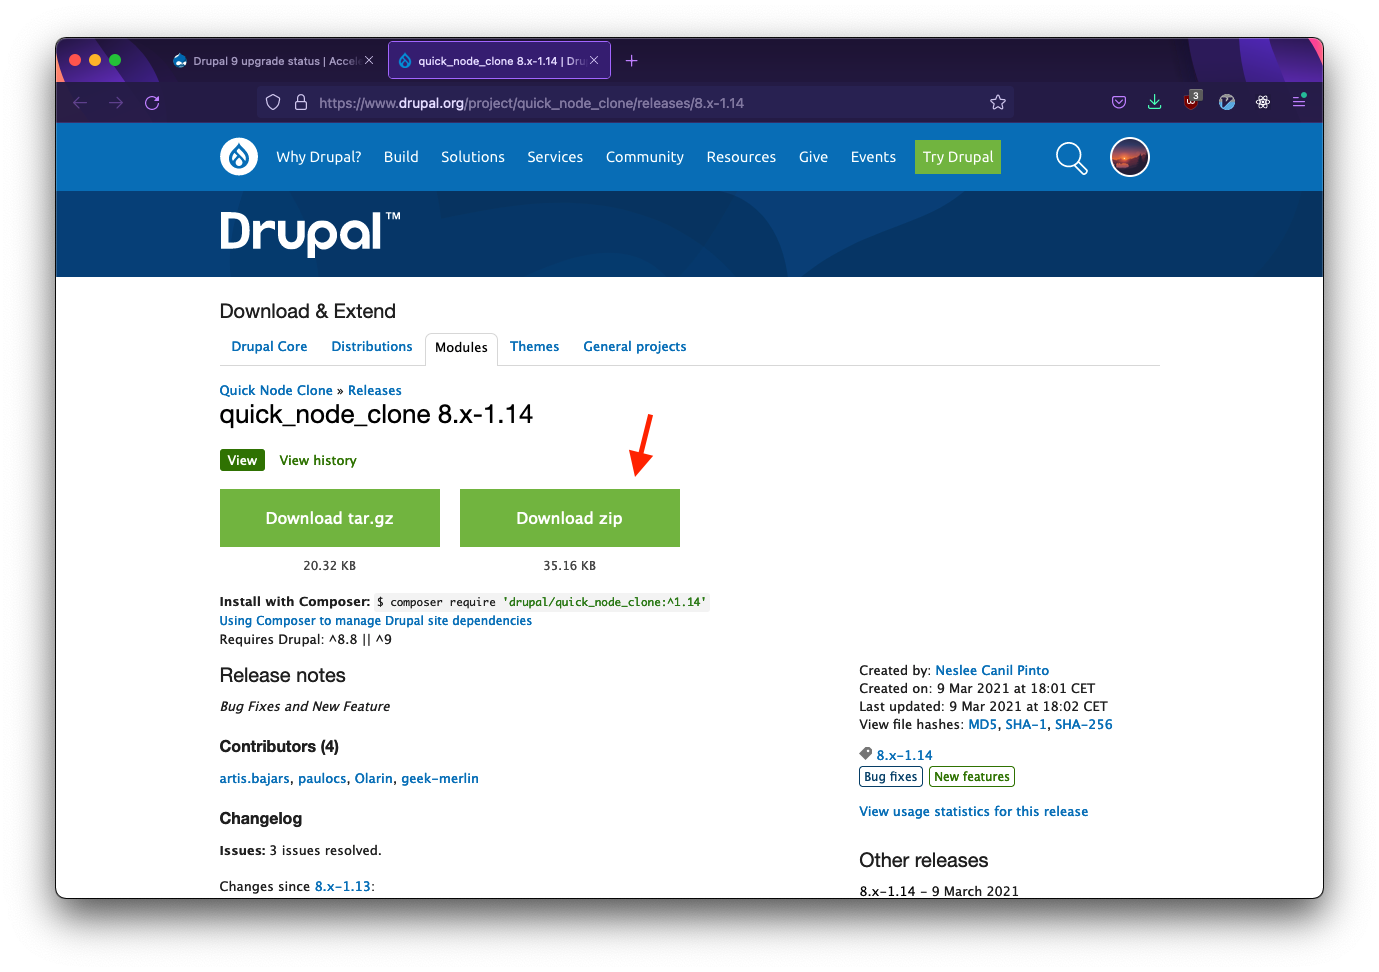
Downloading a copy of a module.
At this stage, we have a copy of the module saved directly on our machine as a .zip file. Unzip the module.
Open the WebDAV window once again and drag-n-drop the folder into the modules folder in your WebDAV window.
Note how in the screenshot below, we are dragging the unzipped folder.
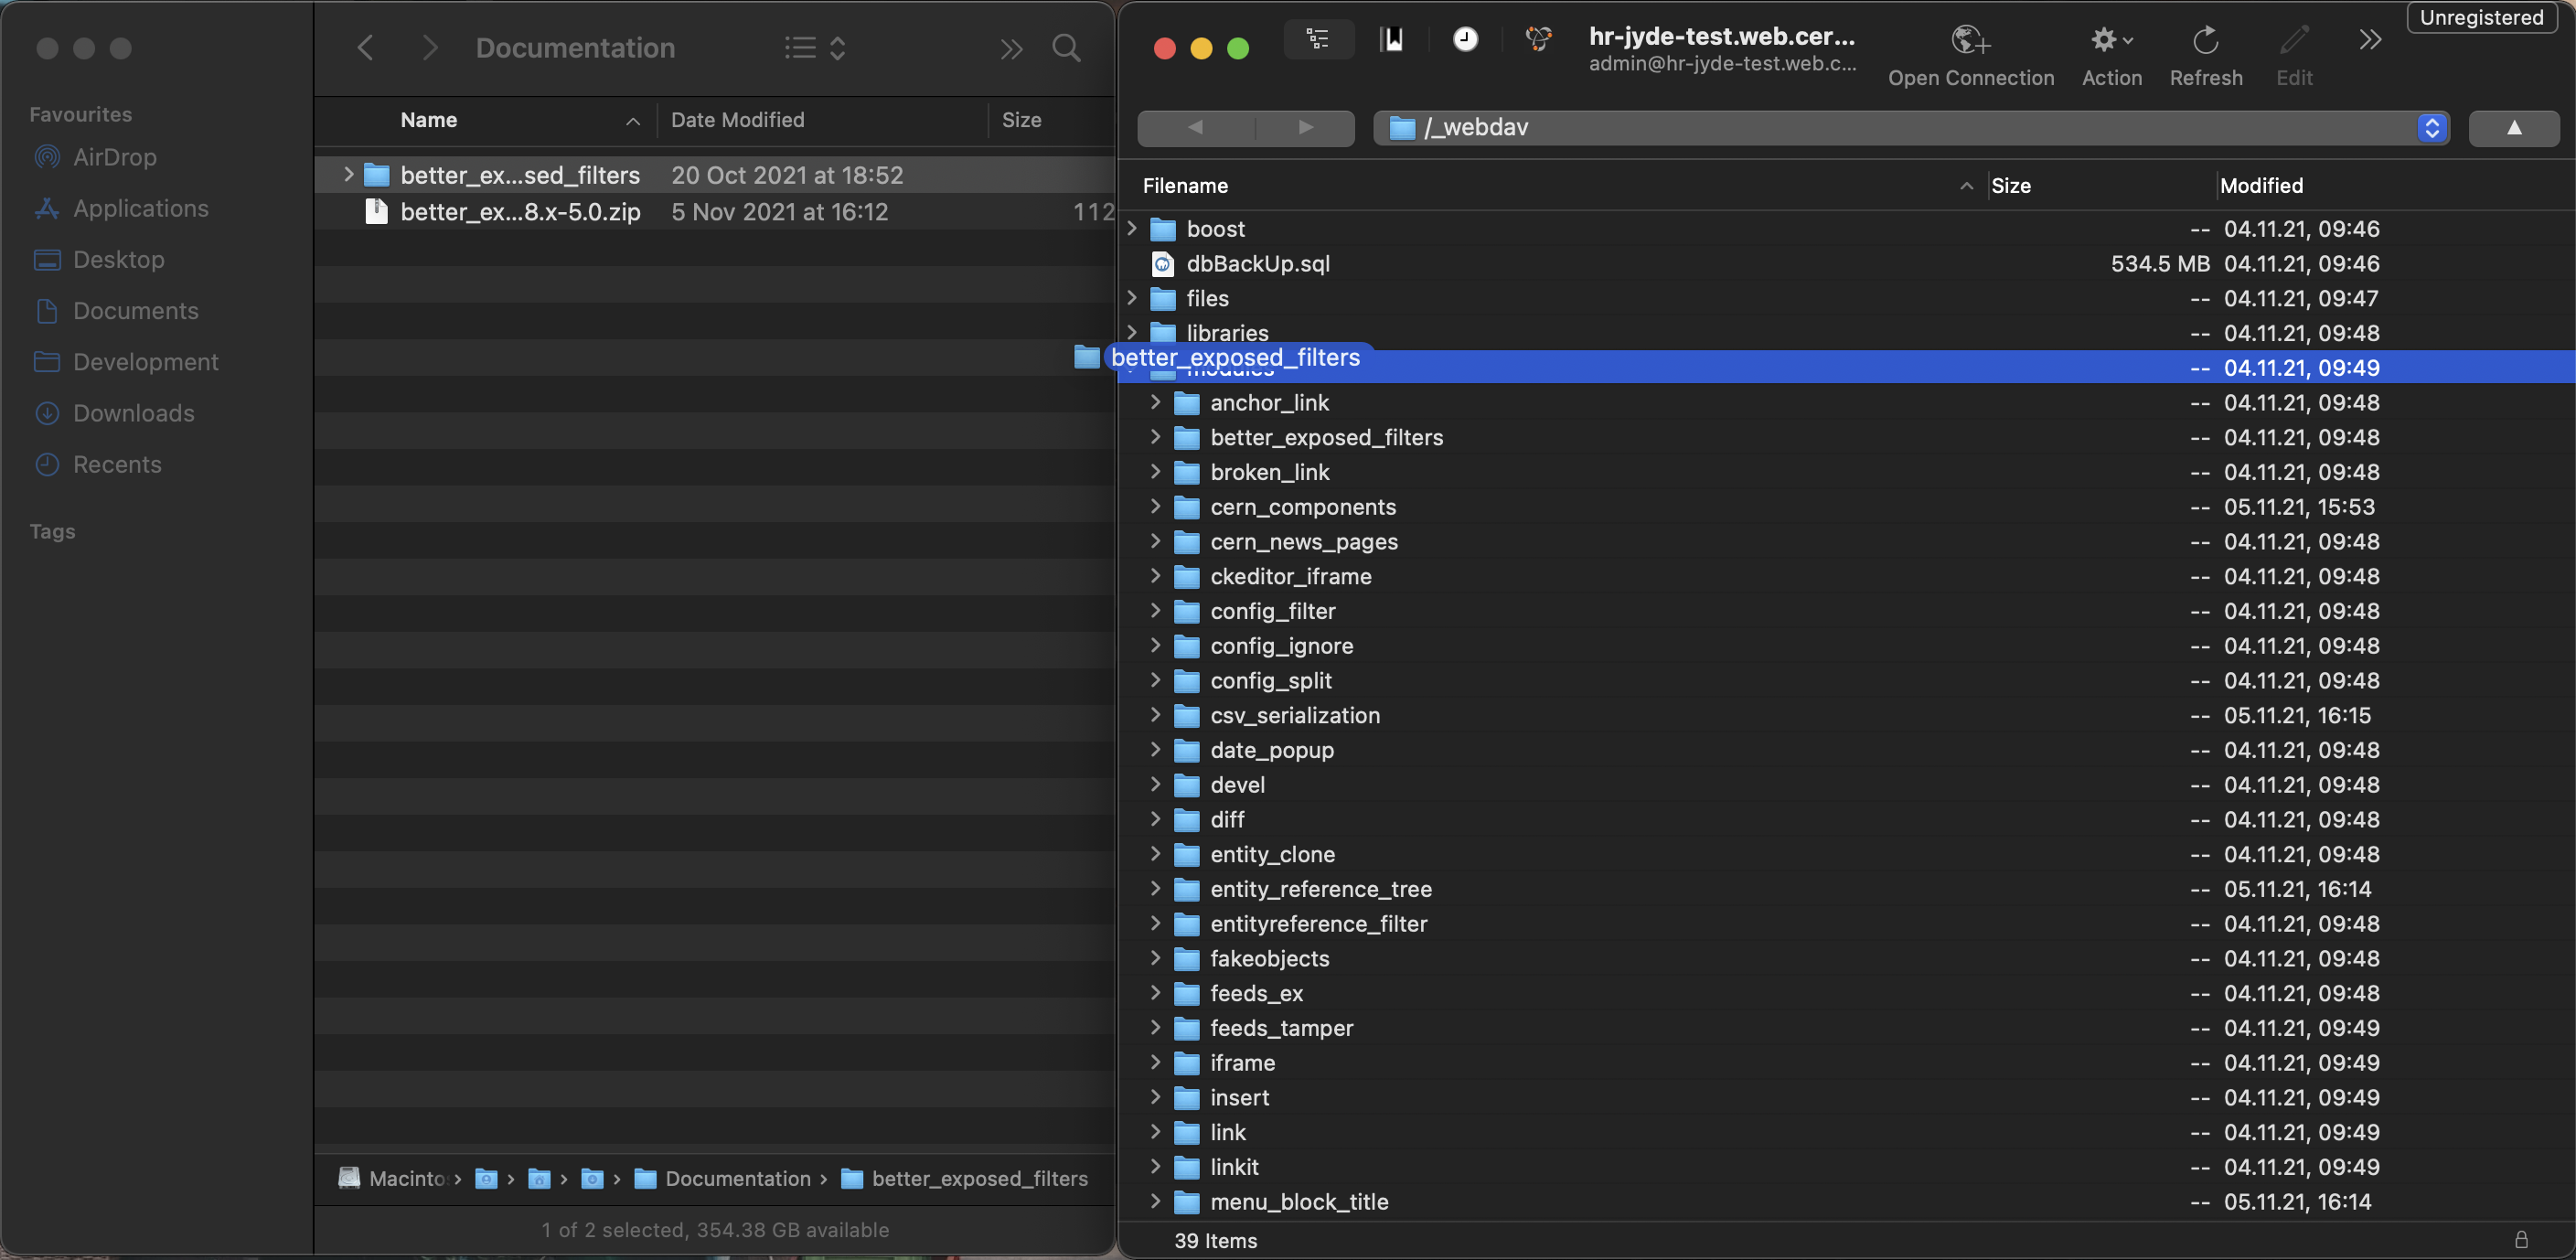
Dragging the unzipped module onto your server.
This will prompt a window asking you to confirm the overwrite. Select Continue.
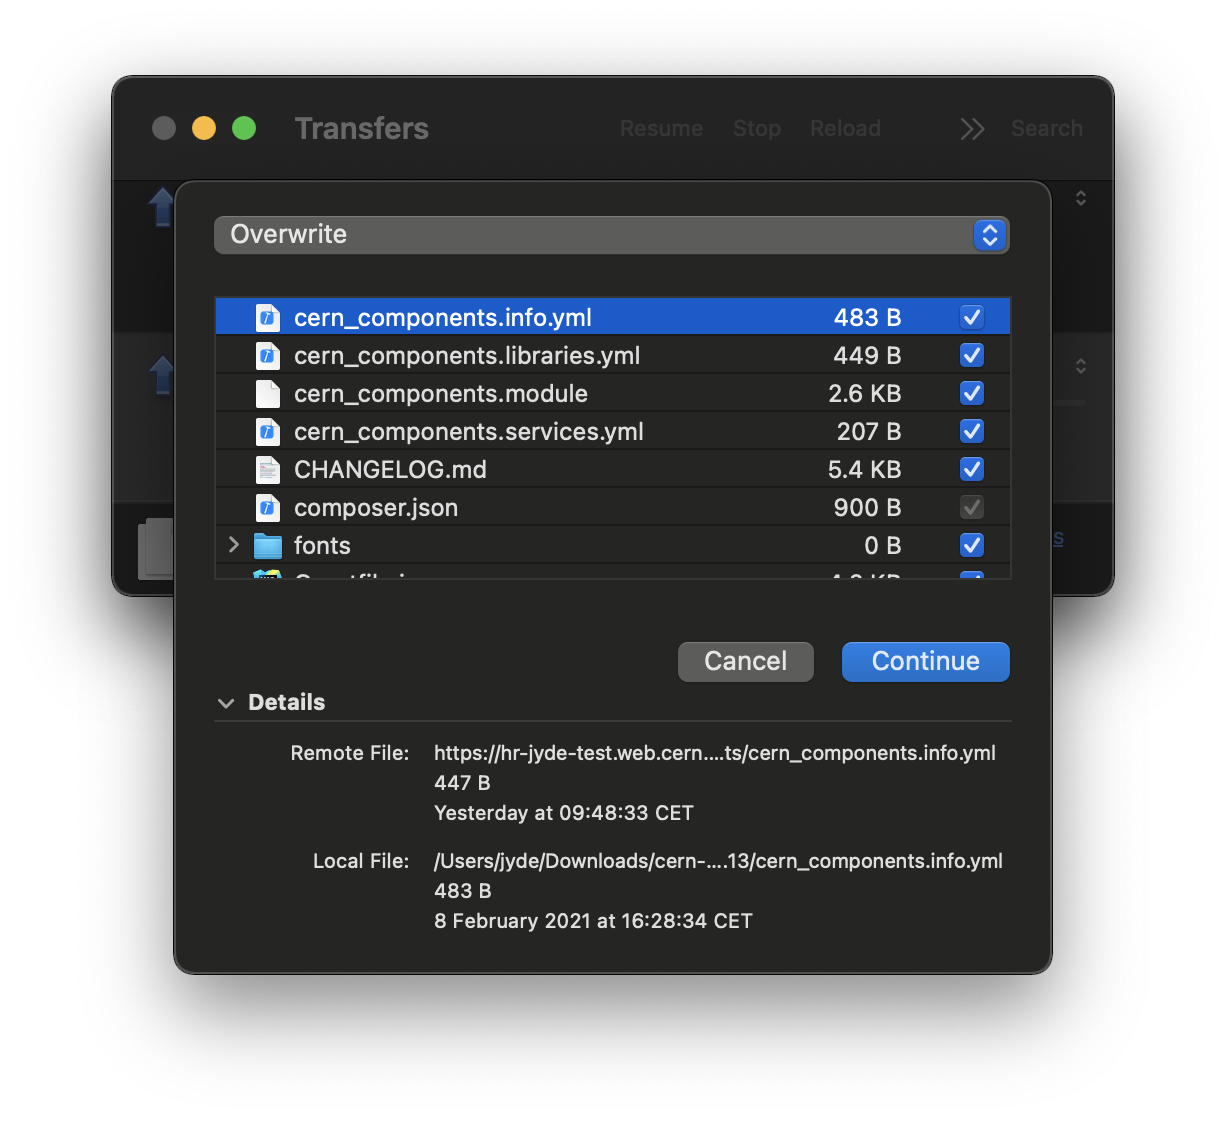
Overwriting the old copy of the module.
Once the transfer has finished, the module in question has been updated accordingly.
If you are updating modules through the Upgrade Status report, re-scan the module(s) you have updated to verify the update.
Repeat this process for each module in need of an update.
Updating Modules via Composer
Modules can be updated in the same way as they are installed. Check the docs on installing a custom module via composer.
If you wish to upgrade the modules on just a clone and not all the environments, you may create a new branch and point a clone to this version. Specifically explained here where to configure this new branch.