Roles and Permissions
An overview of Roles and Permissions can be obtained by opening the People page.
When you create a new CERN Drupal website, a predefined list of roles is automatically implemented:
- Anonymous User: All anonymous users.
- Authenticated User: All authenticated users regardless of their role.
- Administrator: Administrative access to the website.
- CERN Registered: Represents the currently active CERN primary accounts.
- CERN Shared: Represents the currently active CERN secondary and service accounts.
- HEP Trusted: HEP people registered in the CERN HR database, authenticated using HEP systems.
- Verified External: Ex-members of personnel, like retirees, former staff, etc.
- Unverified External: Anonymous unverified people (e.g. like external/lightweight accounts).
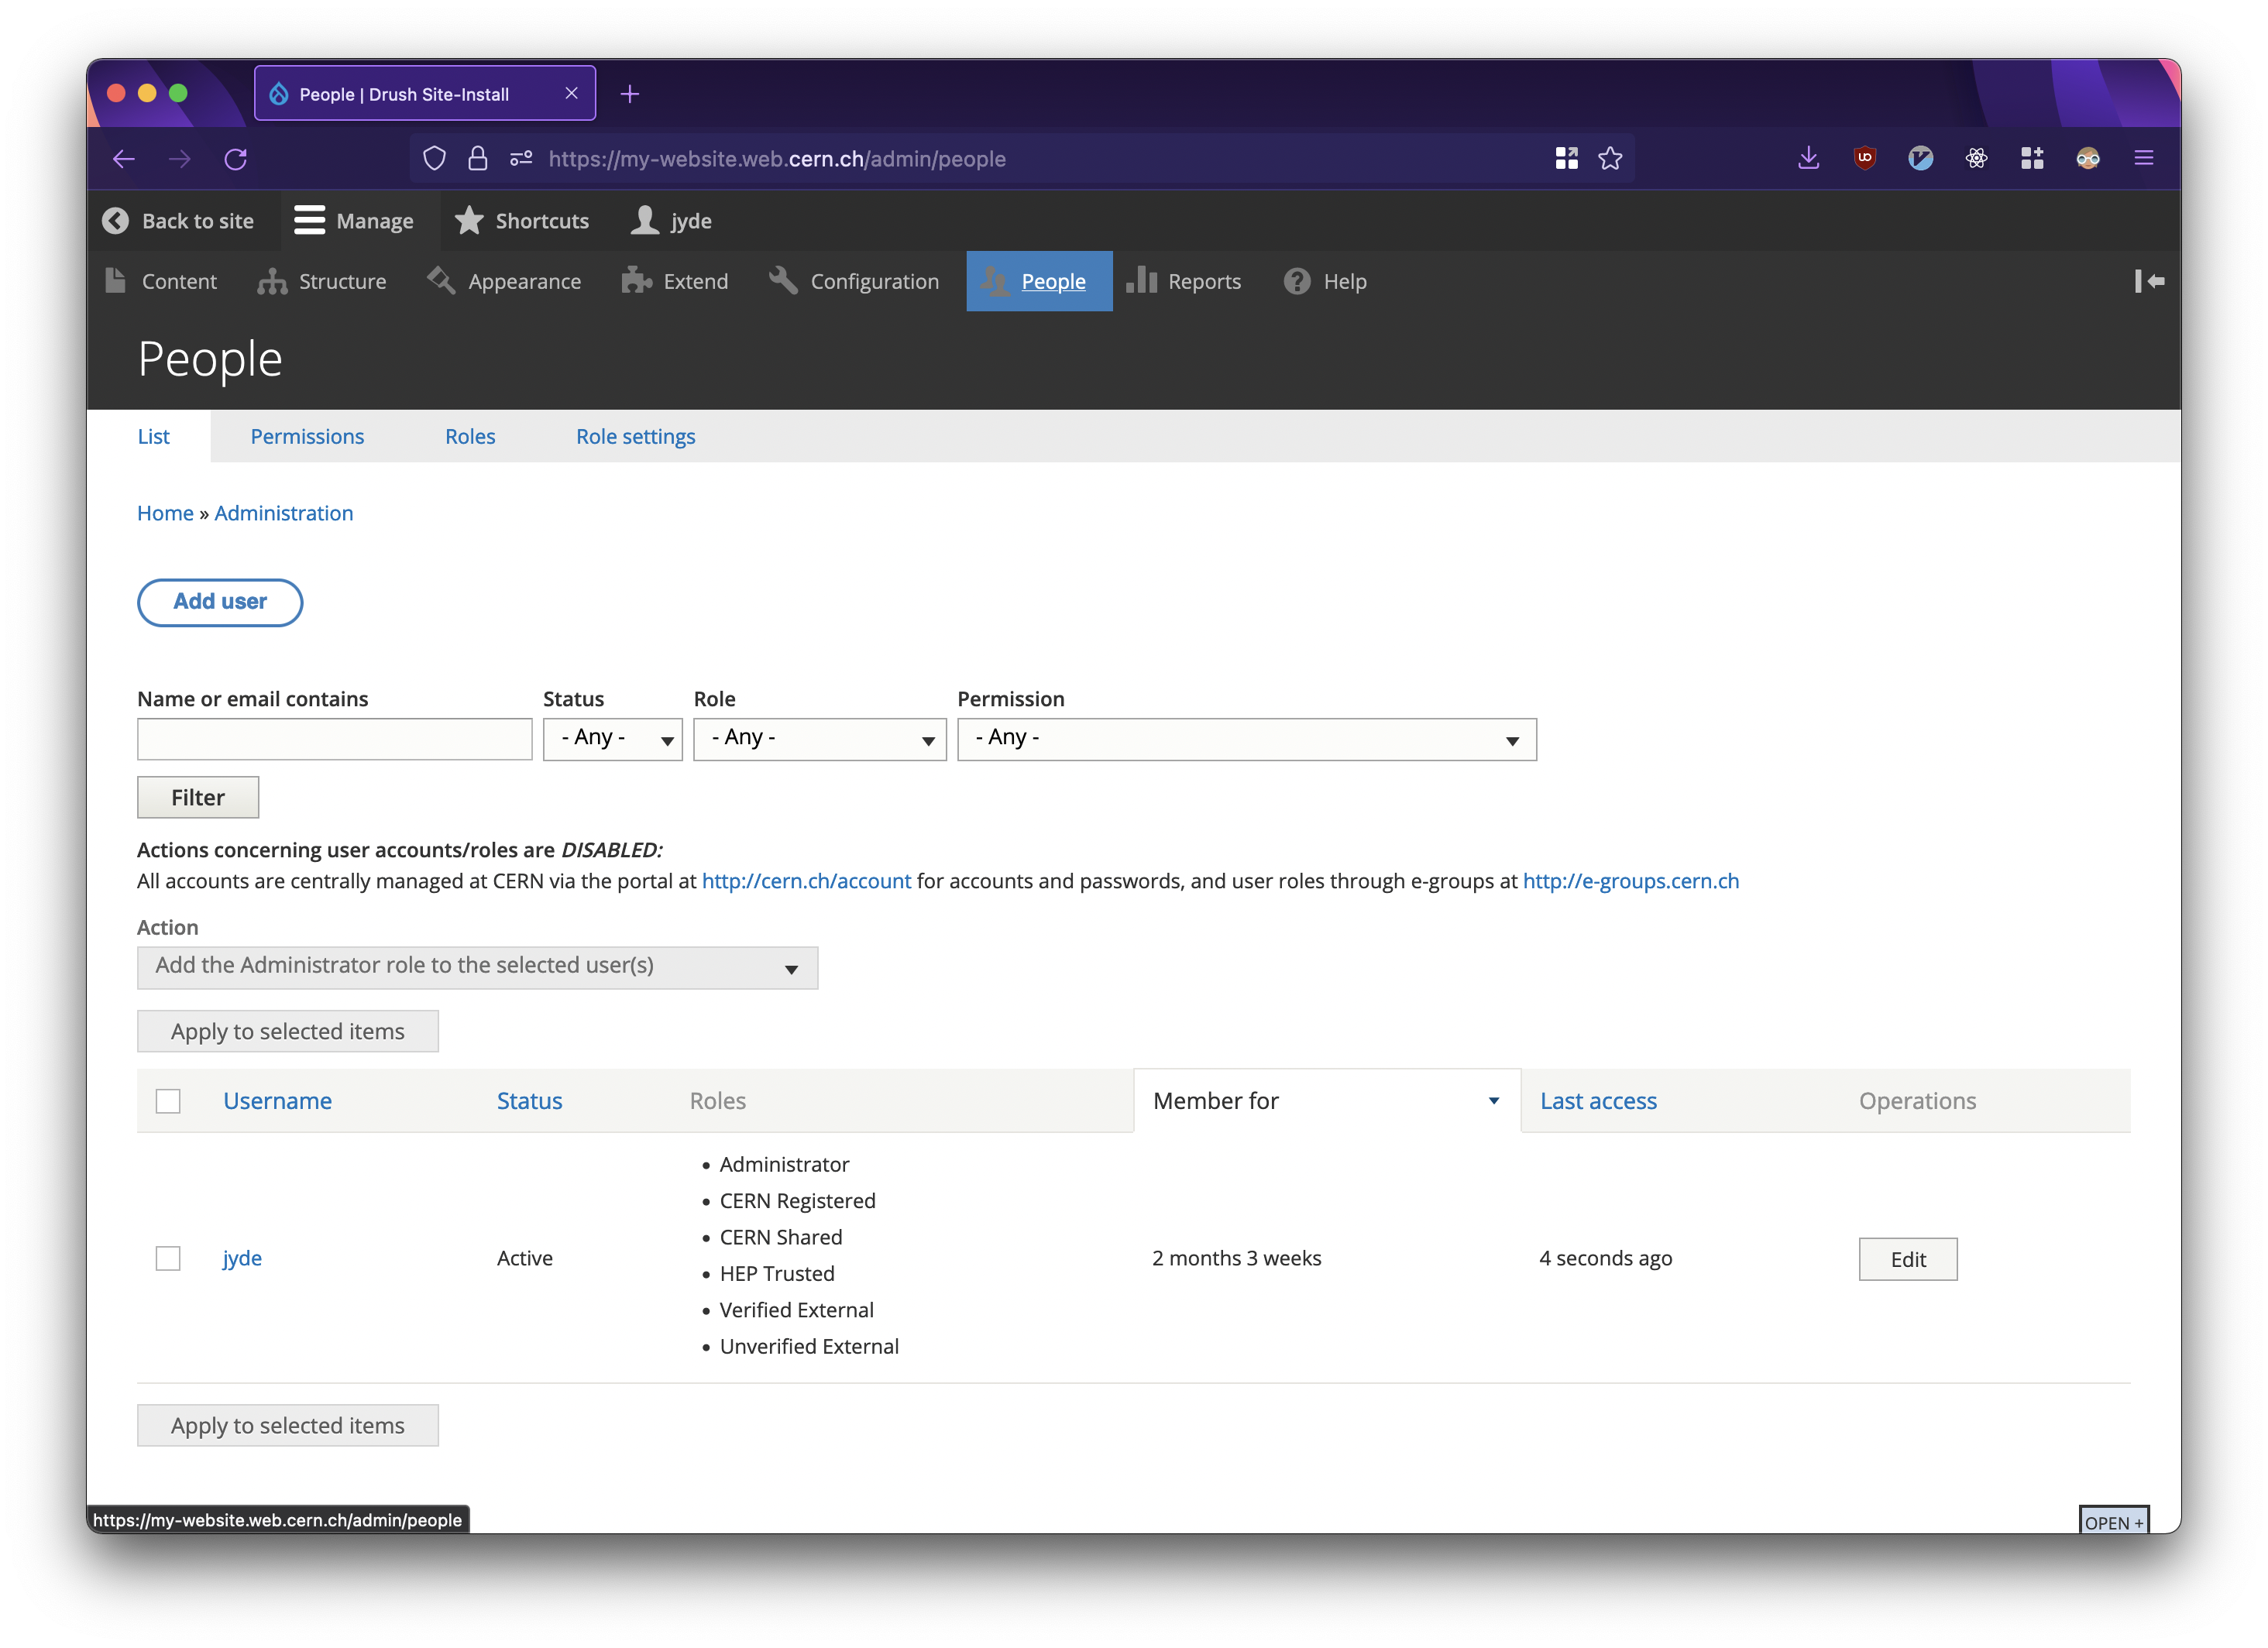
Overview of users of a Drupal website.
Configuring administration privileges for a freshly created website
As explained above websites come with predefined roles, one of them behind the administrator role. The admin role sets access to every part of the website and that consequently means that the users that are granted this role, have the ability to modify every aspect of the website.
All freshly created websites have mapped the drupal-supporters e-group to this role. This is a requirement for support, please don't remove this group.
We advice to re-use the administrator e-group seen on the webservices-portal for the website administrator role, but any or multiple groups can be configured. Please follow the instructions under Grant admin access to a new group to configure this initially.
Creating and Assigning Roles
While the predefined roles accommodate most use-cases, it may be relevant to create a new role.
In order to create a new role:
- Visit
<website_url>/admin/people/roles - Click “Add role”
- Give a descriptive name to your role and save it
Now you have a new role. Users can be assigned this role and permissions can be applied.
Creating Permissions
Once a role has been created, permissions can be granted.
There are predefined permissions for almost every basic functionality of your website.
In order to grant a permission to a specific role:
- Visit
<website_url>/admin/people/permissions - Check which roles should have the permissions
- Save the page
or
- Visit
<website_url>/admin/people/permissions/<role_machine_name> - Check permissions for this specific role
- Save the page
The difference between the two solution is that using the first solution, you can give multiple permissions to multiple roles and using the second solution, you can give multiple permission to one role. CERN Drupal Websites also support CERN e-groups meaning that the admins of the websites can use this feature to assign roles to e-group. As such, the admins of a website can grant access to a group of users belonging to a specific e-group.
Common Use Cases
The below outlines the two most common use cases.
Grant editing permissions
In this case, you want to give another user the ability to create new pages. Accordingly, you
- Create a Role, e.g.
Page Editor(or any other name). - Visit the Permissions page of the created role and grant access to editing content for this role.
- Create an e-group and bind it with the role, following the steps already mentioned.
- Add the user's e-mail, e.g.
user@cern.ch, to the e-group.
Grant admin permissions
The admin role has access to every part of the website and that consequently means that the users that are granted this role, have the ability to modify every aspect of the website. As a result, you need to be extra careful before making the decision to grant this role to a user. If you have doubts about this user, we recommend creating a custom role and granting only the specific permissions you want the user to have.
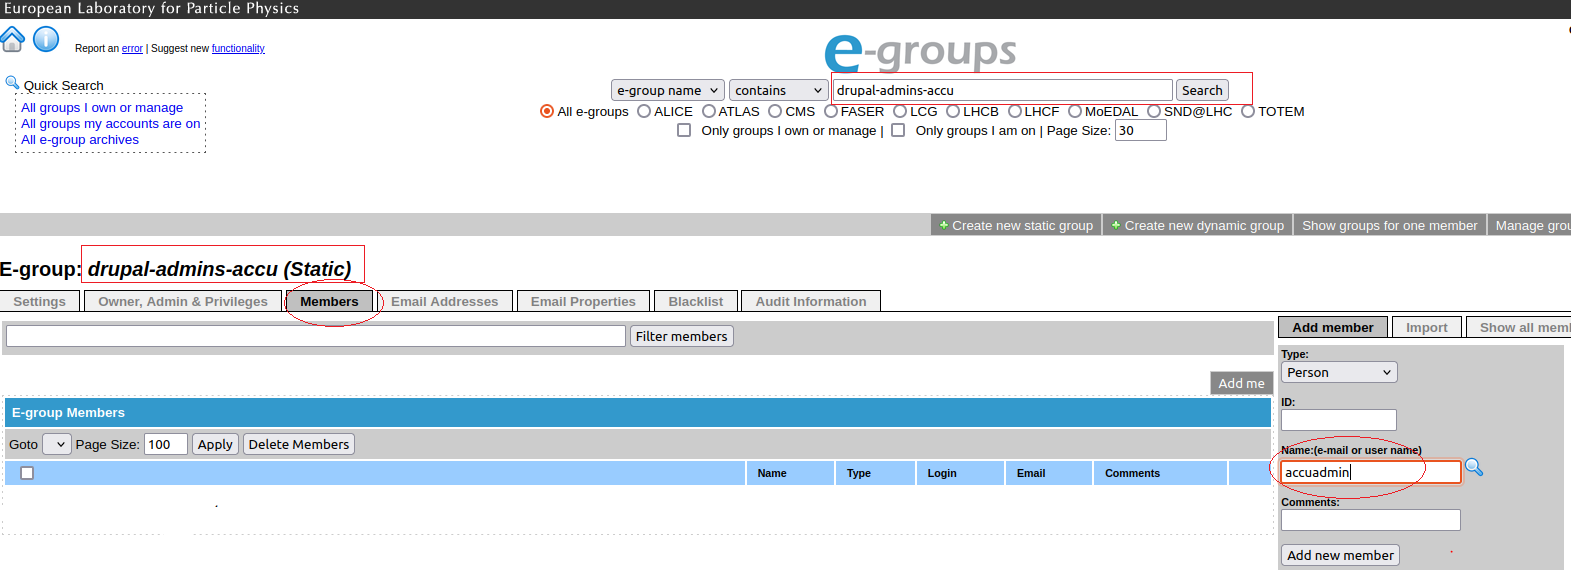
If you are sure that you want to grant admin access to a user, you have the option to either create a new e-group or reuse an existing by visiting https://e-groups.cern.ch/. For this use case, let's assume that the Drupal website that we own is called accu.web.cern.ch and that the user’s email that we want to make an admin is user@cern.ch. After performing a search with the keyword drupal-admins-accu in https://e-groups.cern.ch/, we verify that the e-group drupal-admins-accu already exists. To grant admin permissions, you should add the user as a member of the drupal-admins-accu. If this step is not performed, users do not appear as administrators by default, eg:
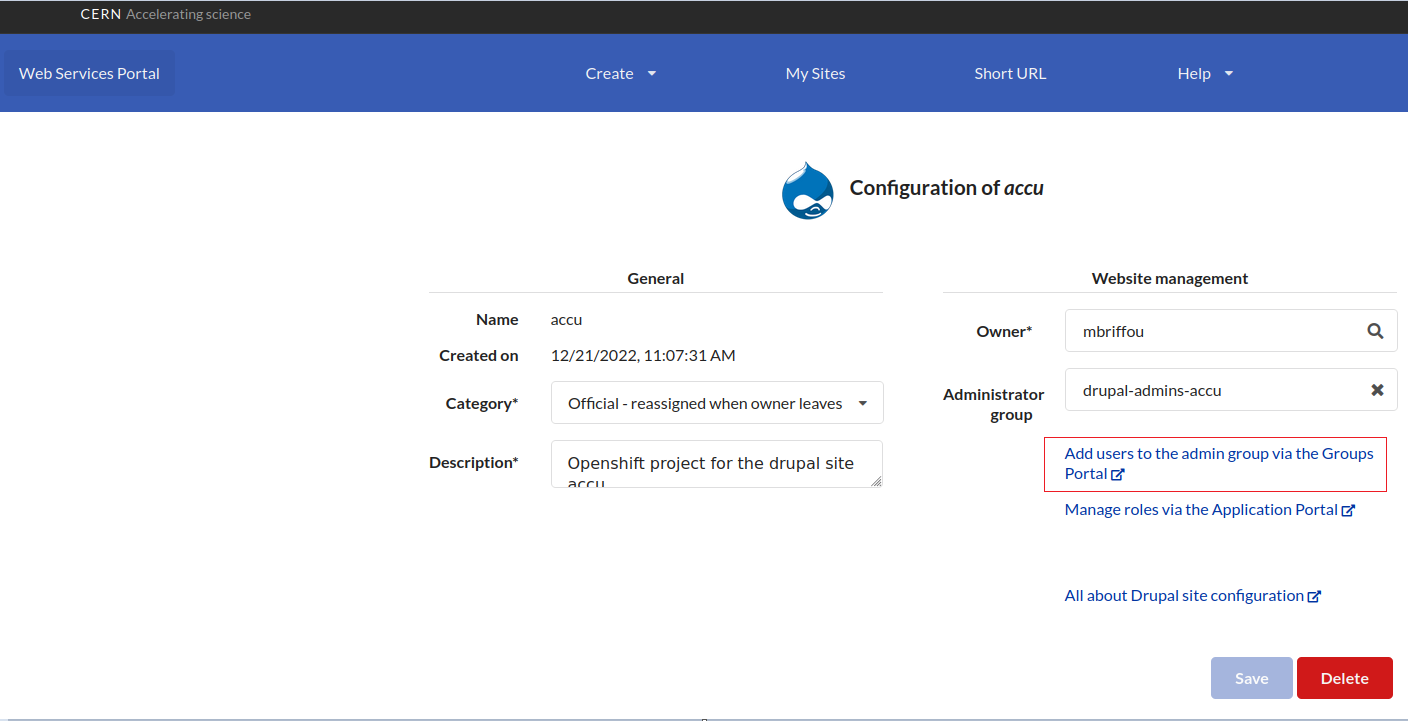
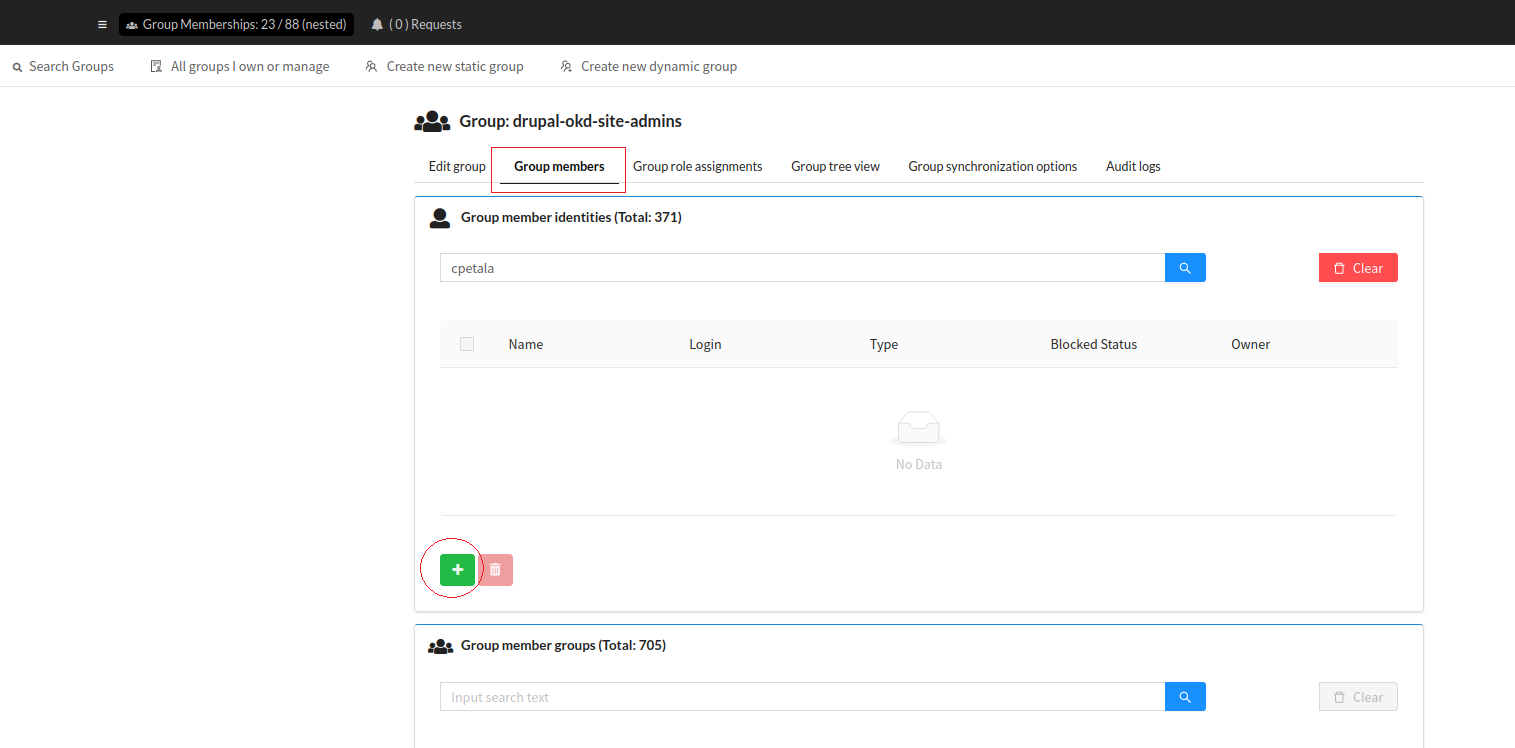
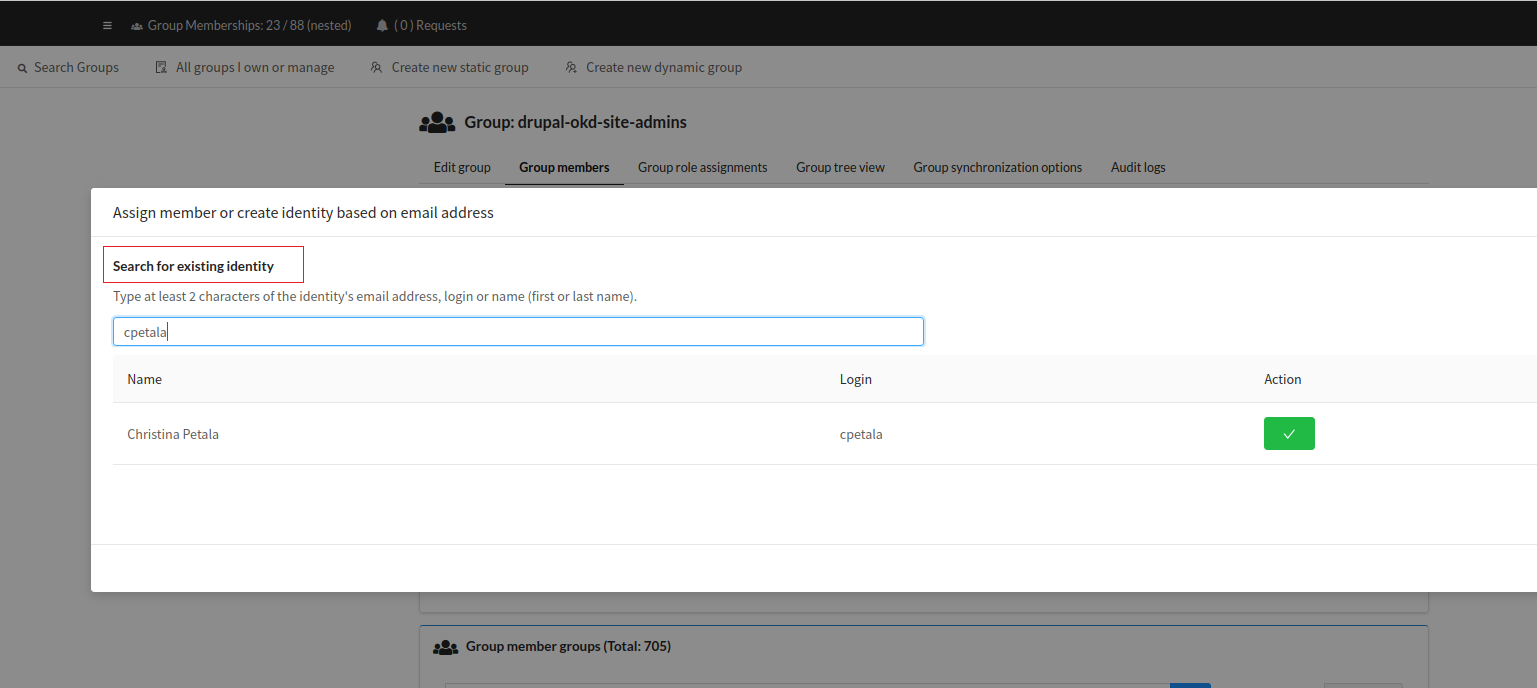
If a group is synchronized from https://e-groups.cern.ch/ you can only reuse it from there, but if this is not the case, you can visit the Webservices Portal and select Add users to the admin group via the Groups Portal, eg:
To sum up:
- Visit https://e-groups.cern.ch/
- Find and reuse an existing or create a new e-group
- Add
user@cern.chto this e-group
Alternatively:
- Go to the Webservices Portal
- Select
Add users to the admin group via the Groups Portal - Locate the group
- Add
user@cern.chto this group
Grant admin access to a new group
This case refers to the situation where a new group is to be added as administrators of the website's content.
Steps:
- Go to the Webservices Portal and select the website you wish to give a new group admin permissions.
- Select
Manage roles via the Application Portal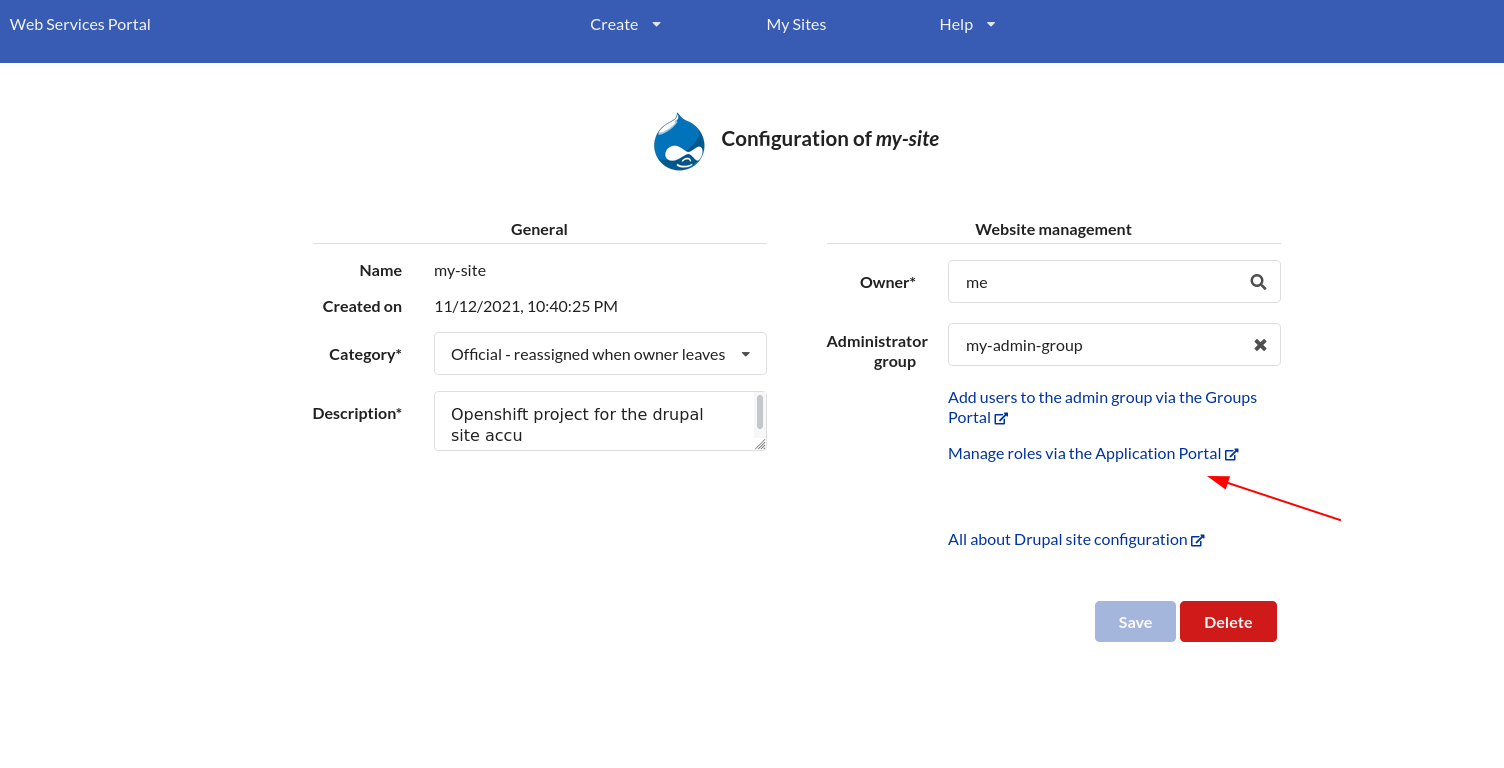
- Click on
Roles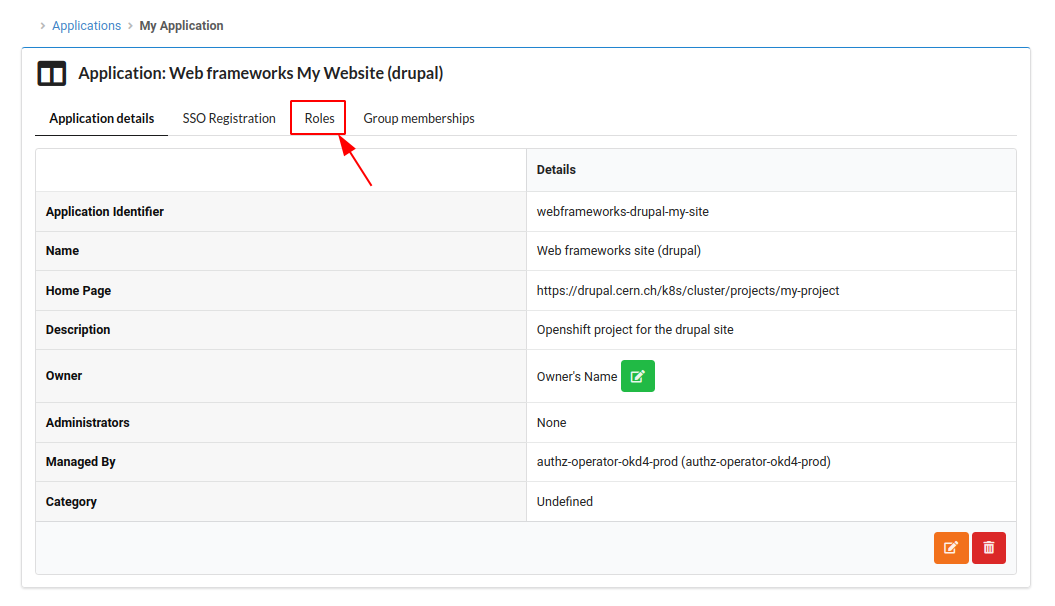
- Click on the green button of the Administrator role
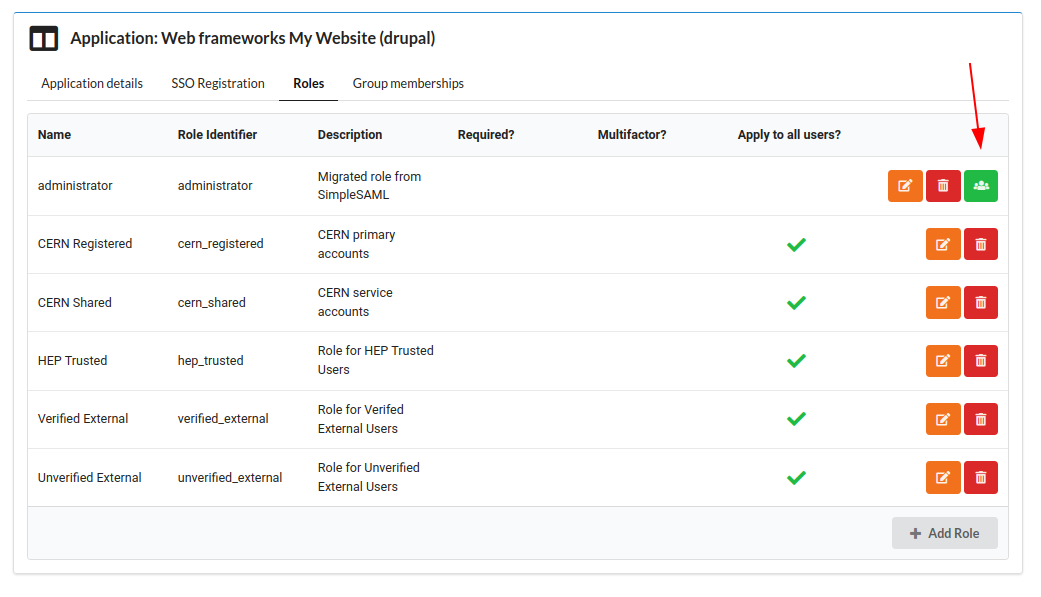
- Type the group you want to add as Administrator
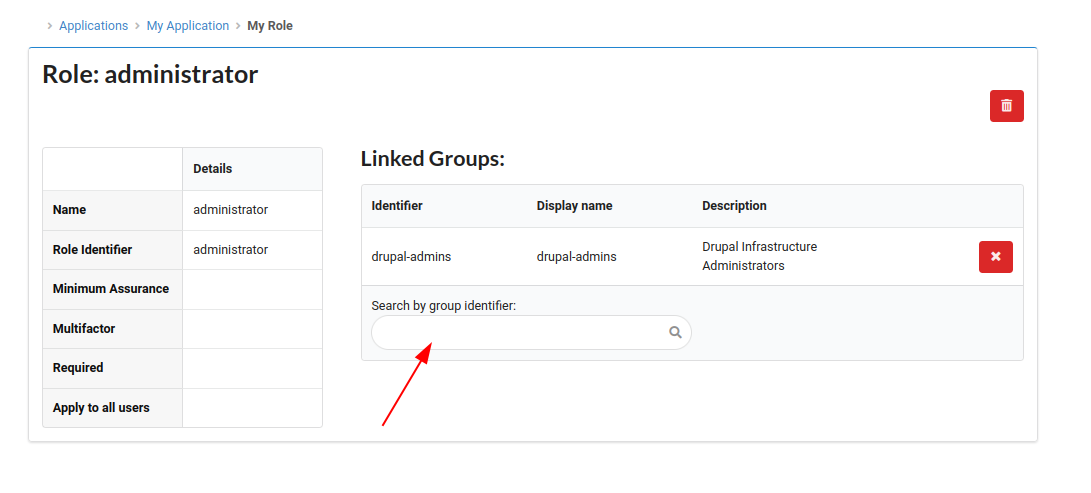
If the role you want to edit does not exist, you can create one using the button on the bottom of the page.
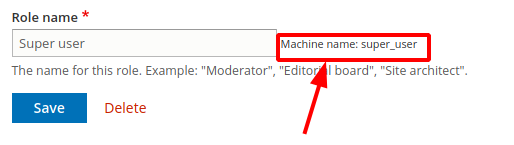
The role_identifier must match the machine name that exists on your Drupal website.
The Machine name can be found under <your-website>.cern.ch/admin/people/roles, and then by editing the role in question, e.g.: